Add a Cluster Role
Now that you have created a cluster, you need to add a Cluster Role. These steps can be completed from any of the servers that the Failover Clustering Feature has been enabled on.
Open Server Manager.
From the Tools menu, select Failover Cluster Manager.
Within the Failover Cluster Manager console, expand the newly created Cluster, highlight Roles on the left and from within the Actions menu on the right, select Configure Role.

In the High Availability Wizard, select Next on the Before you Begin screen.
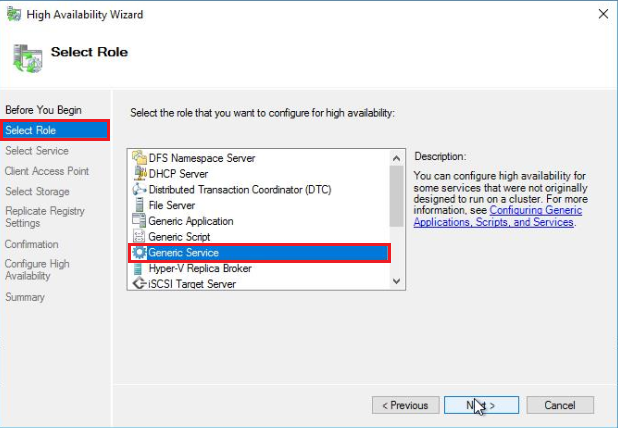
On the Select Role screen, highlight the Generic Service role and select Next.
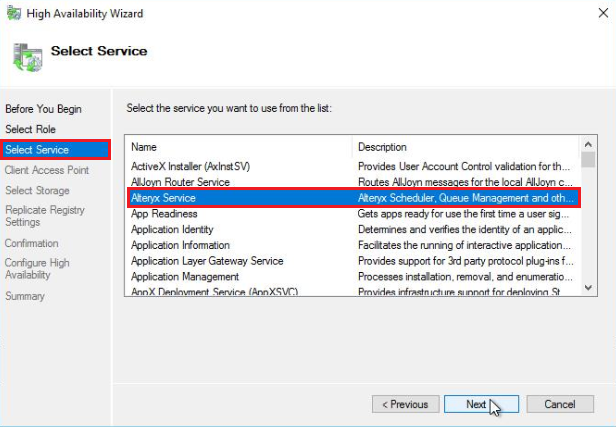
On the Select Service screen, select Alteryx Service and select Next to proceed.
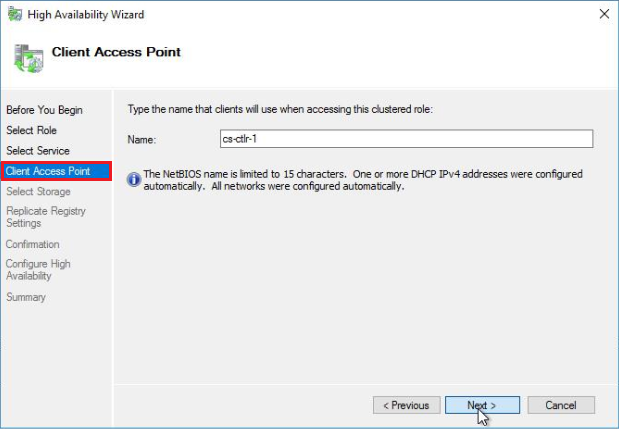
On the Client Access Point screen, enter a DNS name that will be used for accessing the cluster role. This is the DNS name that will be used when configuring Server UI and Worker nodes to access the High Availability Controller cluster.
Select Next on the Select Storage and Replicate Registry Settings screens.
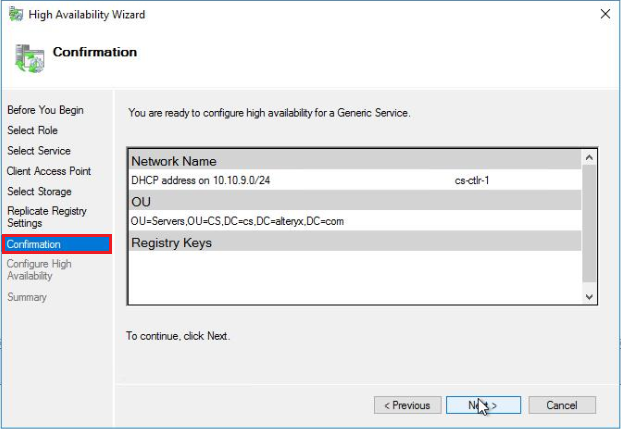
On the Confirmation screen, verify the settings and select Next.
Upon clicking Next on step 9, the Cluster Role will be created and added to DNS. Once the High Availability role has been created, you should receive a Summary screen stating the high availability was successfully configured for the role. Select Finish to close the High Availability Wizard.
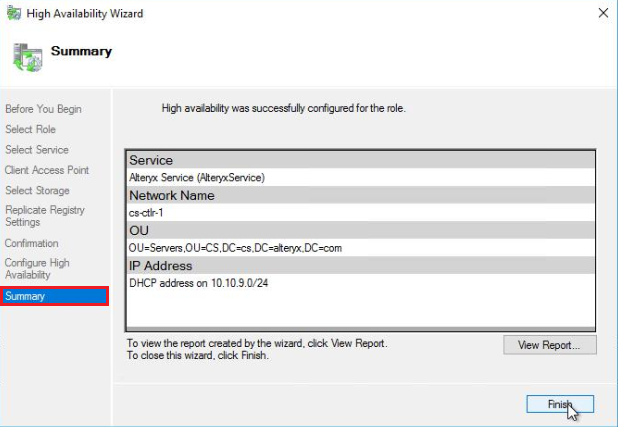
Microsoft Failover Clustering will now manage the state of the AlteryxService.exe on each of the nodes in the cluster. The AlteryxService.exe will be started on the “Owner” (active) node and the failover nodes will be in a stopped state. In the event of a failure on the “Owner” node, Microsoft Failover Clustering will start the AlteryxService.exe on one of the failover nodes and automatically direct traffic to the active Alteryx Controller.