Existing Auto Insights datasets imported via the Admin Portal, including Playbooks Synthetic datasets, and data ingested via the Designer Desktop Uploader tool, can be connected to Alteryx One by linking to an Alteryx One dataset. Furthermore, Auto Insights datasets already connected to an Alteryx One Dataset can be switched to another Alteryx One dataset source.
Hinweis
Connecting an Auto Insights dataset to Alteryx One is a one-way action that cannot be undone. However, the steps below can be repeated to connect to a different Alteryx One dataset as needed.
Due to the benefits listed above, Auto Insights datasets imported via the Admin Portal should be connected to an Alteryx One dataset.
To migrate an Auto Insights dataset and connect to an Alteryx One dataset or connect to a different Alteryx One dataset...
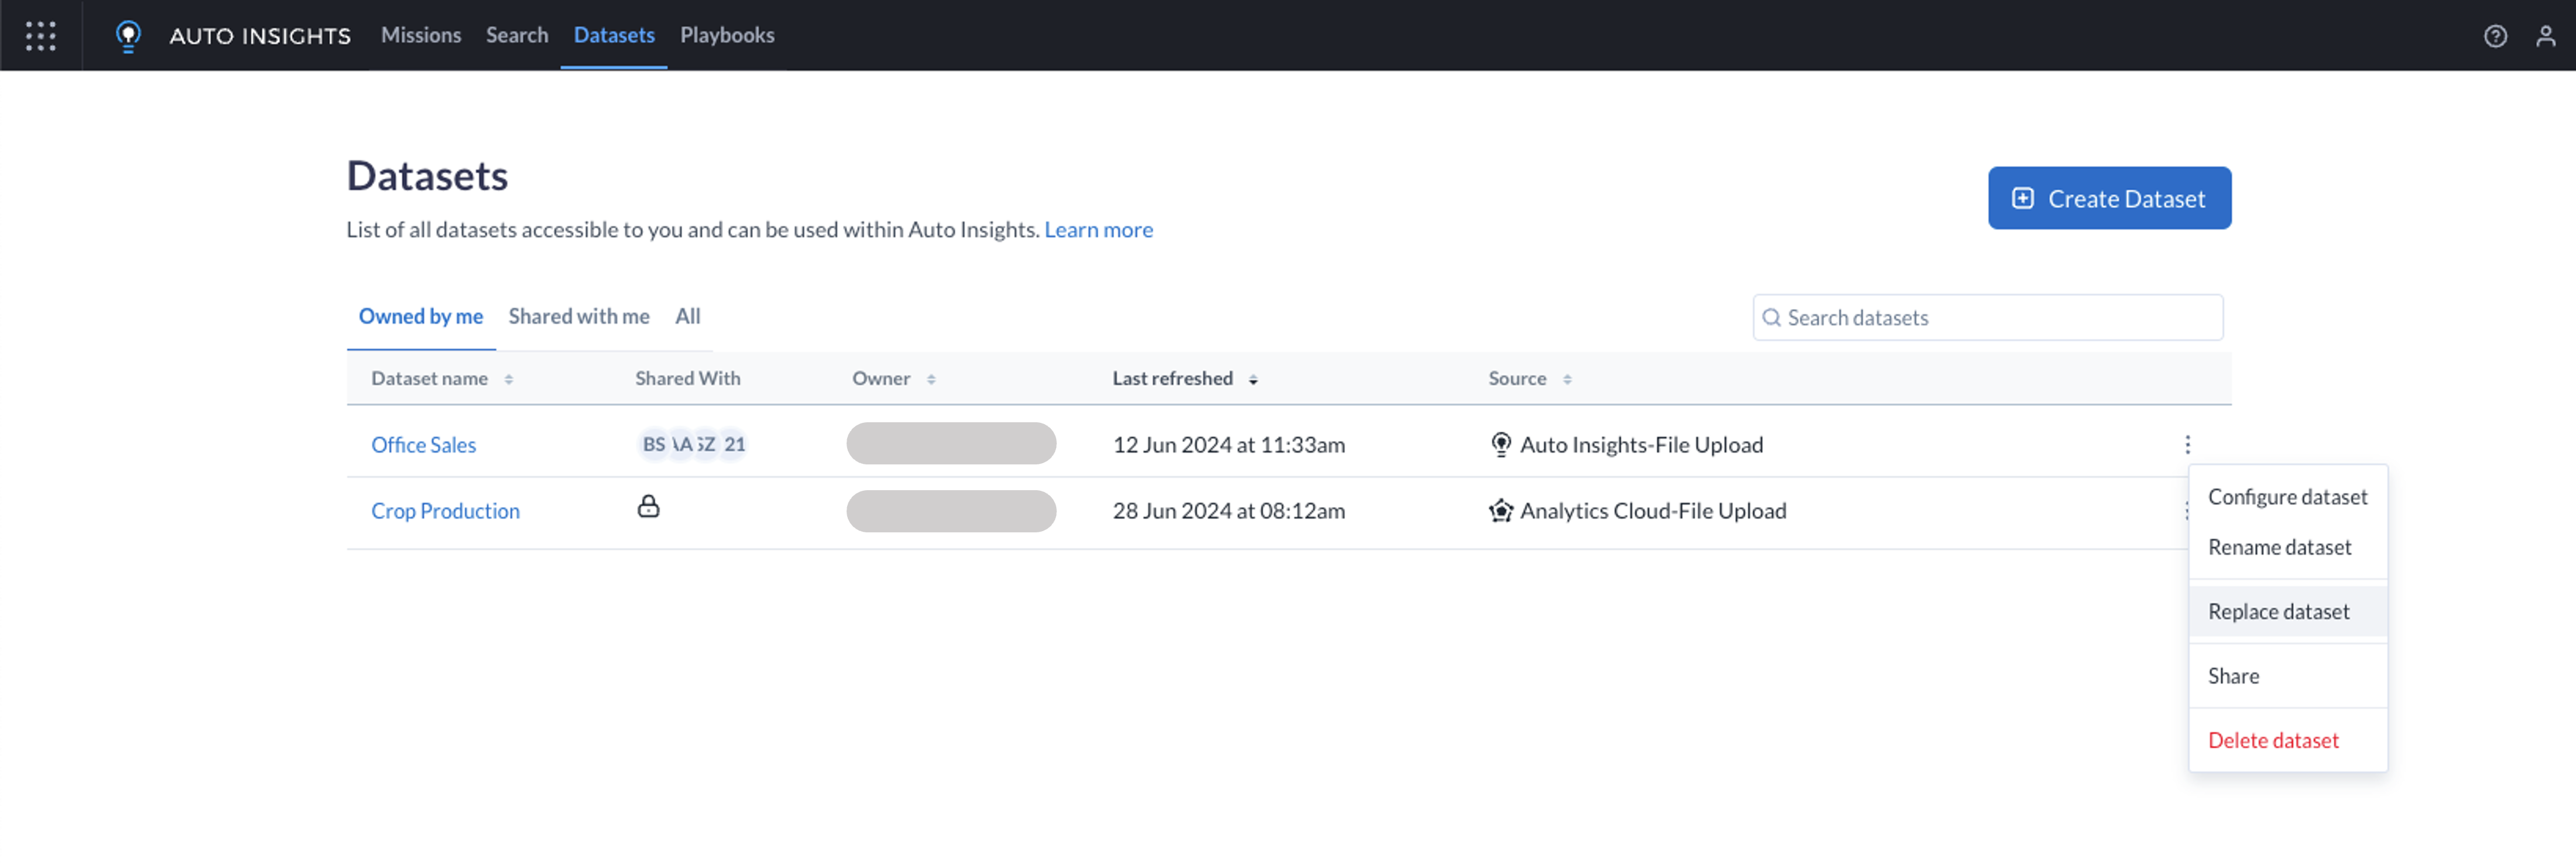
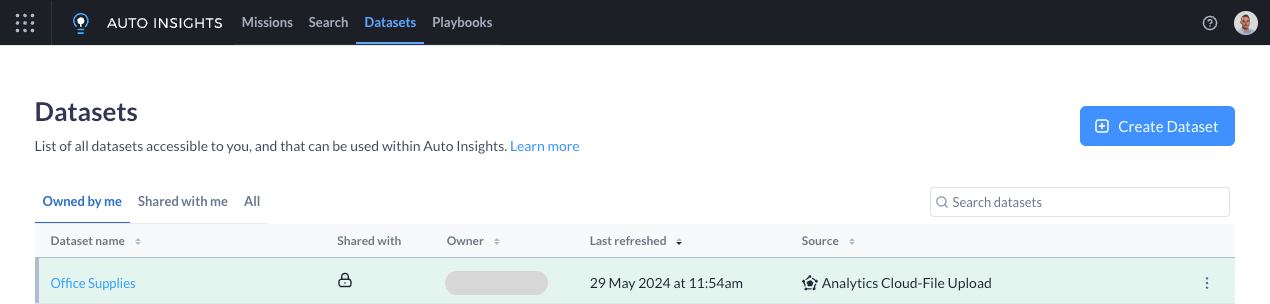
From the Datasets page, select the Dataset you want to connect to an Alteryx One dataset and select the ellipsis icon > Replace dataset.
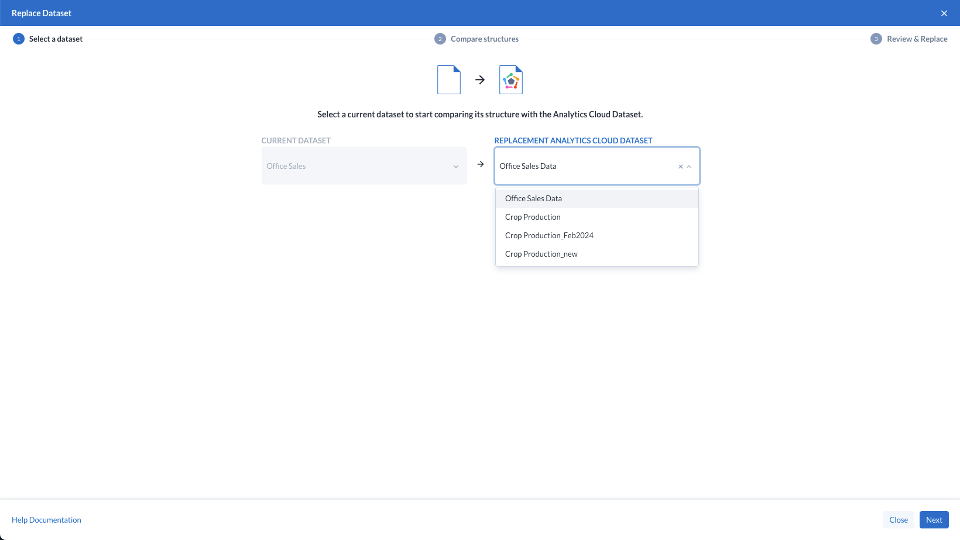
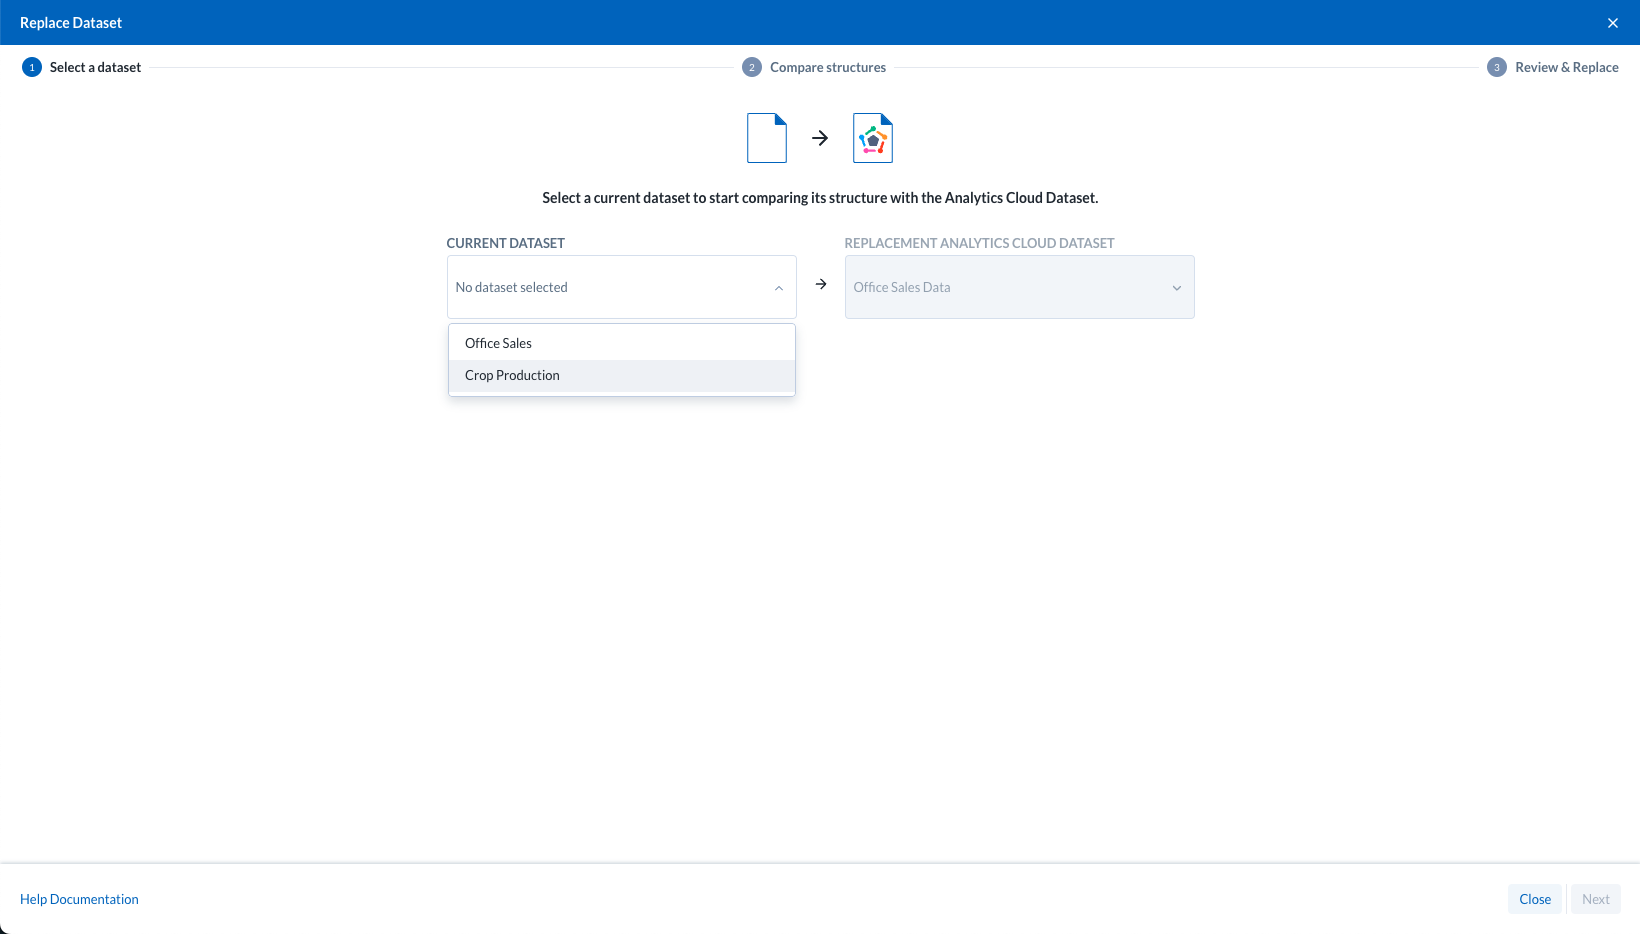
Use the Replacement Alteryx One Dataset dropdown to select the Alteryx One Dataset that should be connected to this Auto Insights dataset, and select Next.
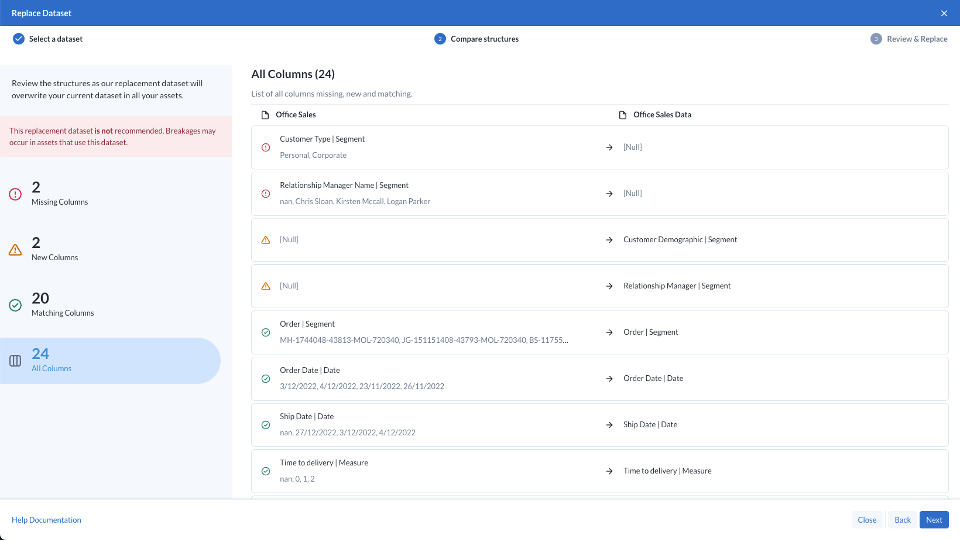
Compare the differences in structure between the current Auto Insights dataset and the proposed Alteryx One dataset. Differences in structure between the two datasets will be highlighted in the Missing Columns and New Columns sections, with details shown on the right after selecting the respective tab.
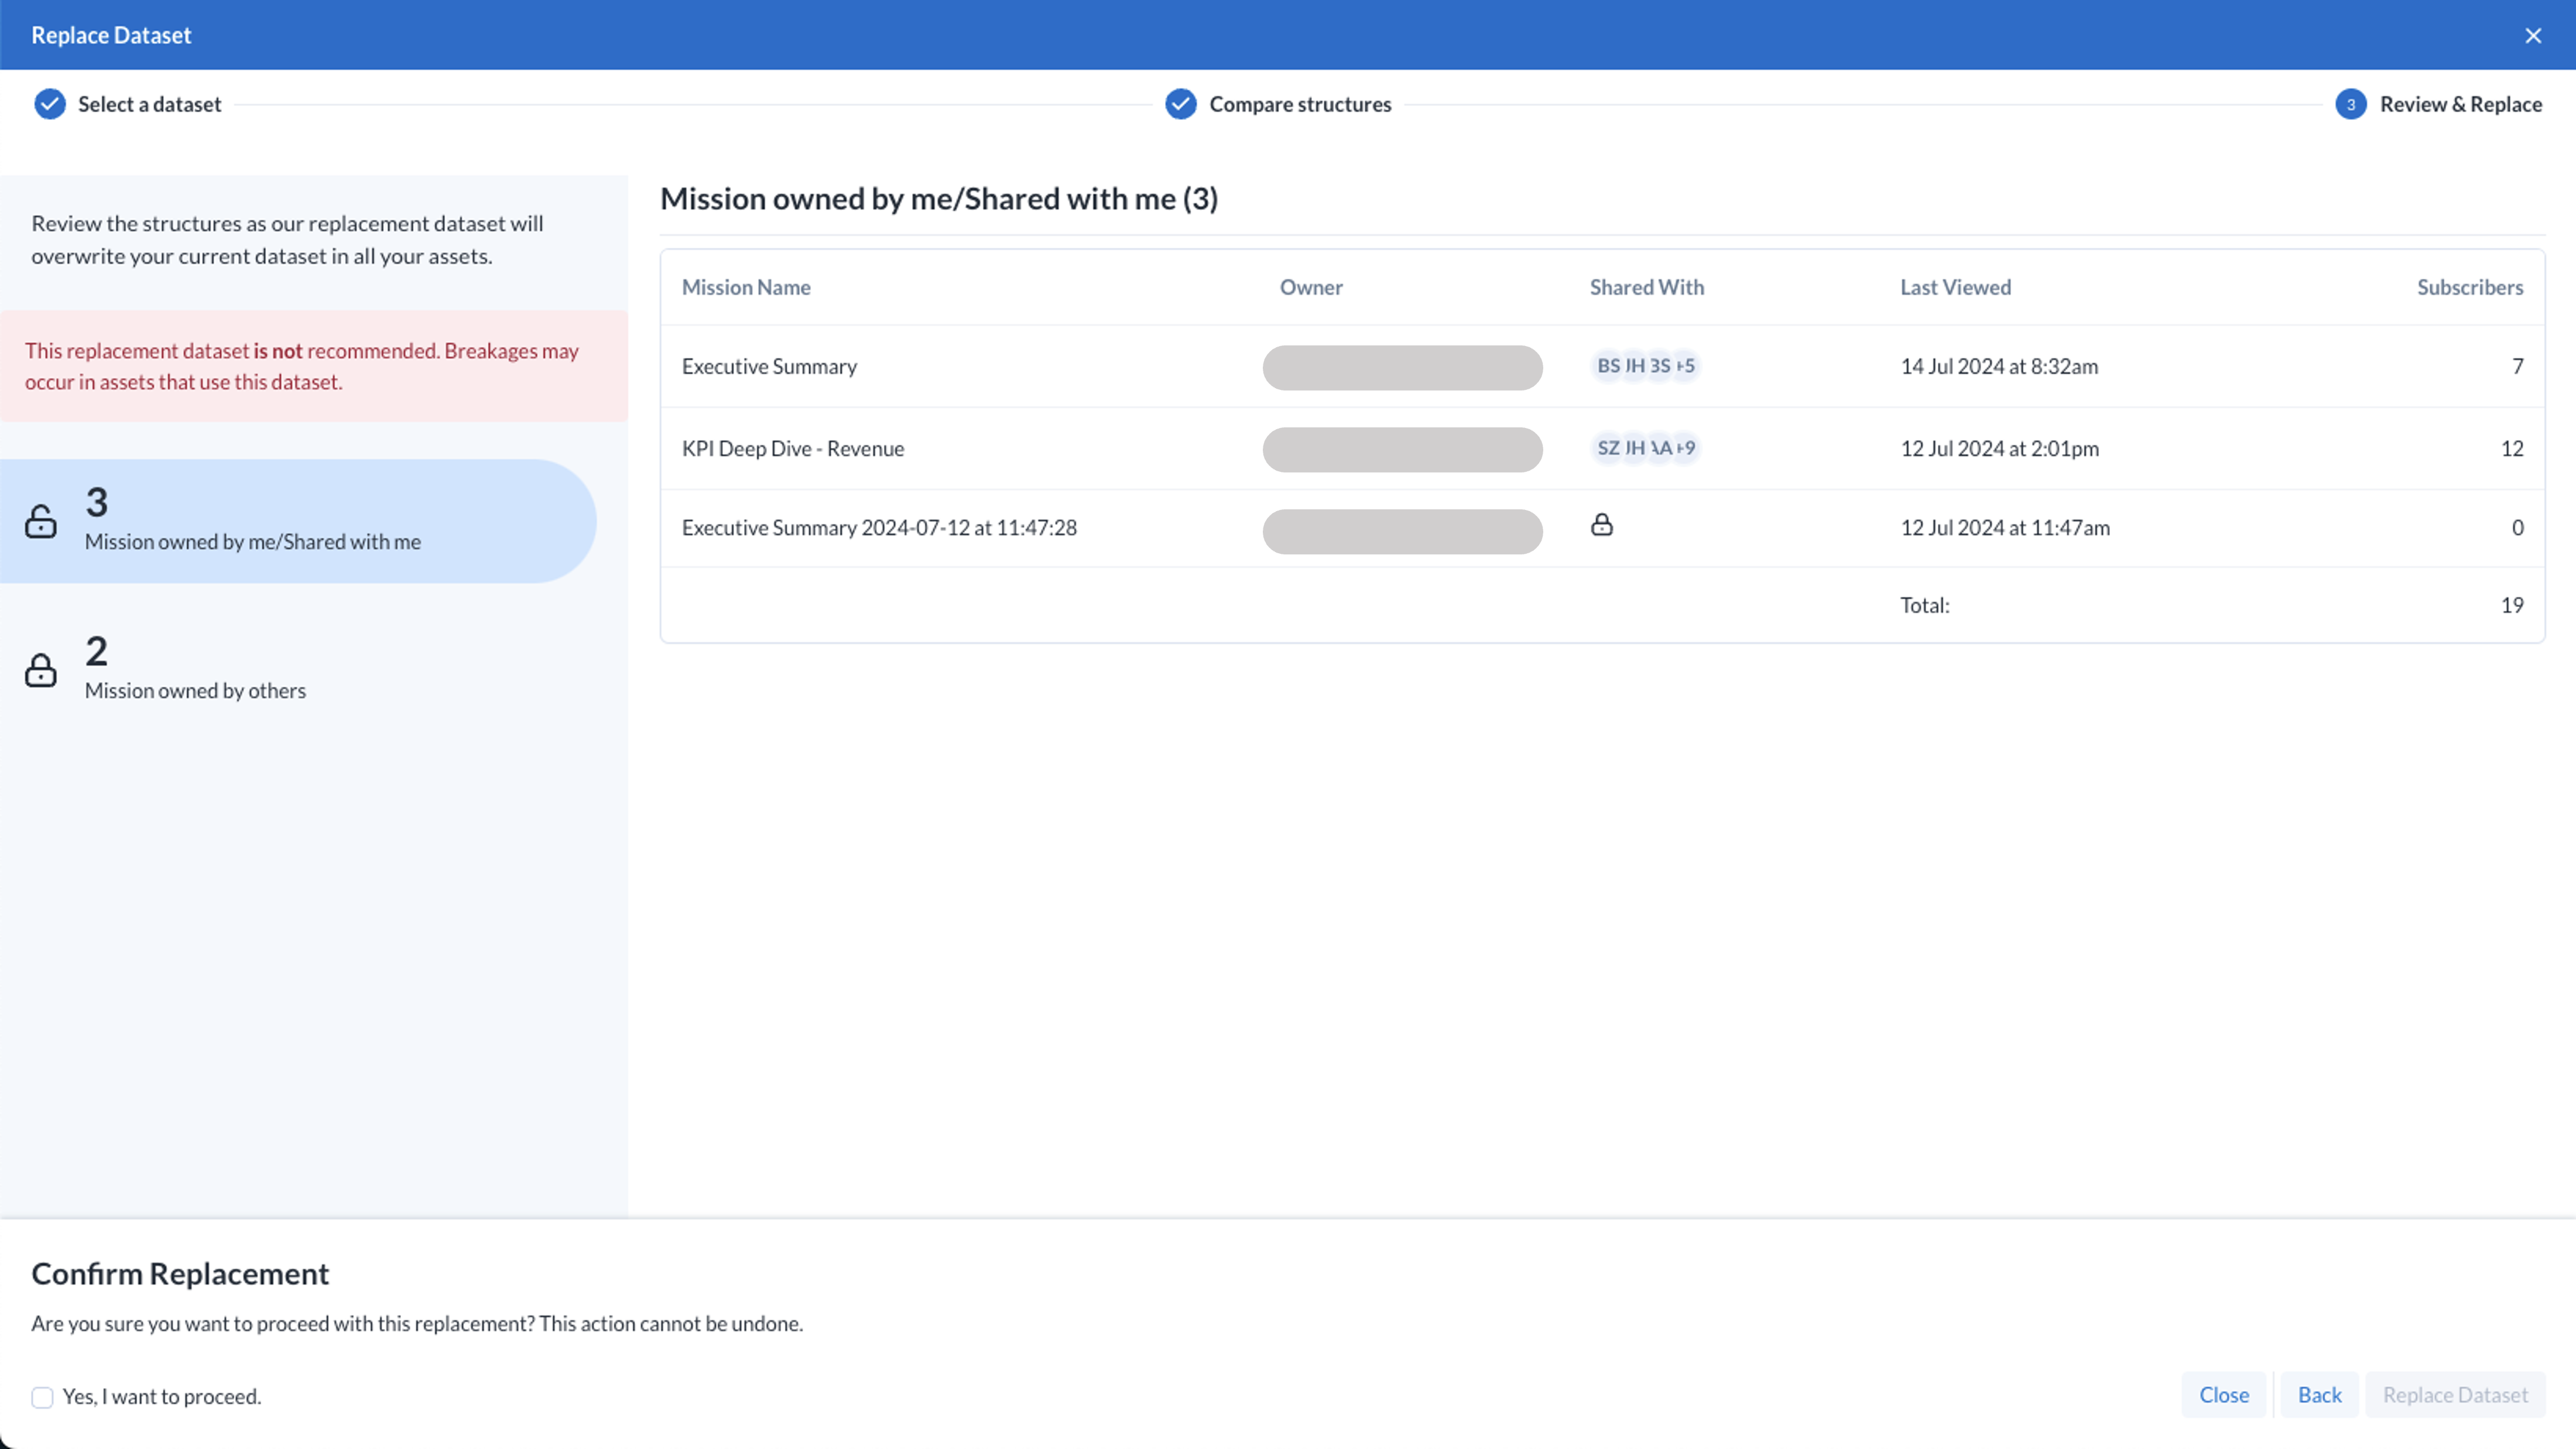
If existing columns are missing from the replacement dataset, Auto Insights will highlight that the replacement dataset is not recommended using a red banner, as shown.
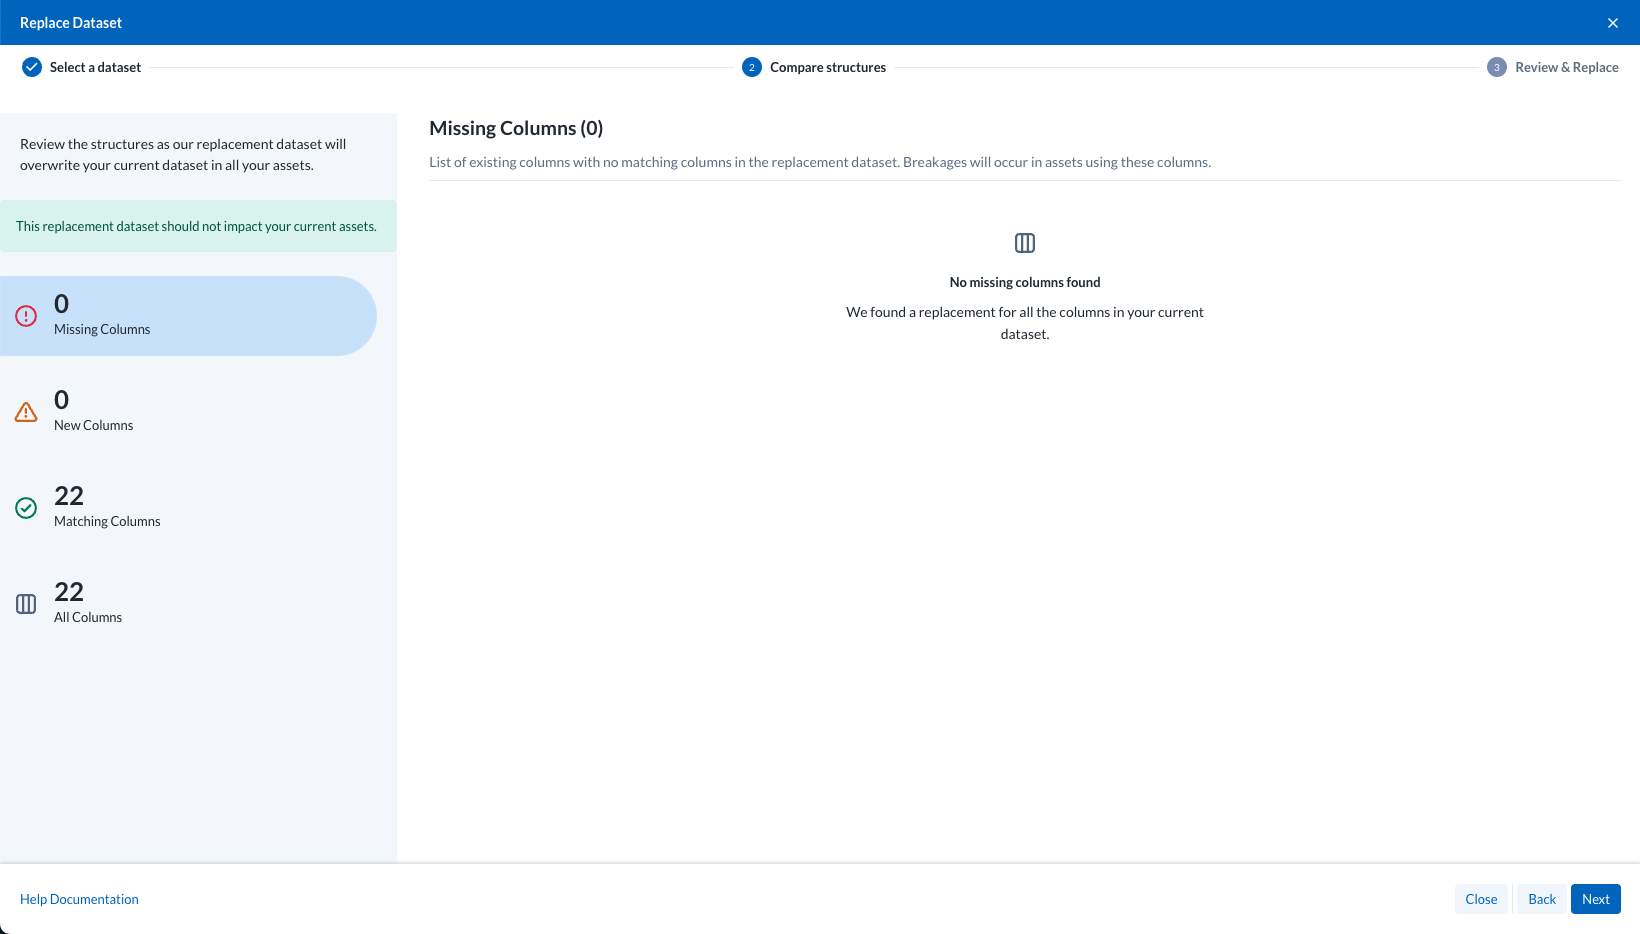
If no existing columns are missing from the new dataset, Auto Insights will confirm that the replacement dataset should not impact your current assets.
Review the Missions that may be impacted by the data replacement, including both those for which you are the owner or have access, as well as those to which you do not have access - for each of these categories, you will be able to see how many missions and/or subscriptions have been created which use this dataset. Select the checkbox and select Replace Dataset to proceed with the replacement.
Auto Insights will begin importing and analyzing the new dataset from Alteryx One. You can hover your mouse cursor over the Analyzing… status to see the ingestion progress.

Once the ingestion has completed, the Analyzing… status will clear, and the Dataset is ready to use. Click on the blue hyperlink to select this Dataset and navigate to Missions. All existing Missions referencing this dataset will automatically update with the latest data.
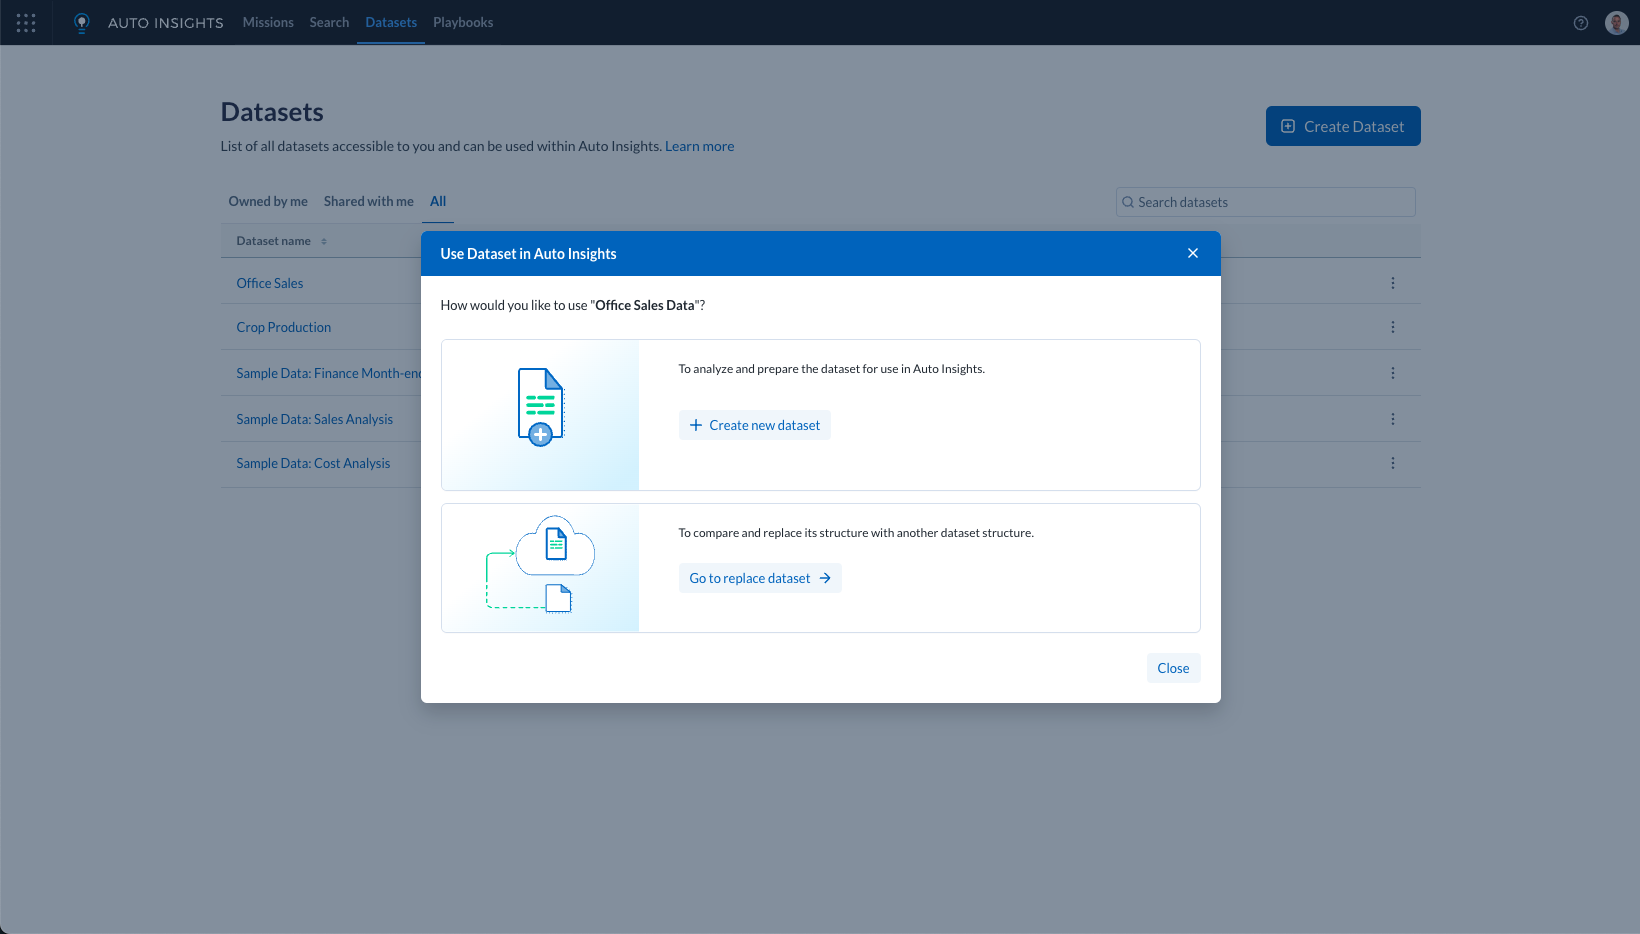
Alternatively, this journey can be started via the Use in Auto Insights option from the Datasets page in Alteryx One, which will navigate into Auto Insights...
If no Auto Insights dataset exists using this Alteryx One dataset, a new one can be created. If one or more Auto Insights datasets already exist, they will be listed allowing the user to select a dataset to launch.
To use the selected Alteryx One dataset as the source for another Auto Insights dataset, select Go to Replace dataset.
Use the Current Dataset dropdown to select the Auto Insights dataset that should be connected to the selected Alteryx One dataset, and select Next.
The above methods can also be used to connect an existing Auto Insights dataset with an Alteryx One source to a new Alteryx One dataset.
The benefits of connecting to an Alteryx One dataset include:
Leverage Alteryx One Connections—Support for 70+ data sources including Databricks, S3, BigQuery, PostgreSQL, and more.
Tighter integration between Alteryx One and Auto Insights—Cloud Workflow > Auto Insights Dataset > Mission > Insights.
Improved dataset refresh capabilities—Multiple refresh schedules per dataset, streamlined ingestion workflow, manual “refresh” action, and orchestrate dataset refresh on the success of previous Cloud workflow using Plans.
Once an existing Auto Insights dataset (that was created via Admin Portal) has been connected to an Alteryx One dataset…
Sharing is configured via Alteryx One, and not within the Auto Insights Admin Portal. Go to Share a Dataset.
Hinweis
Users that have been granted owner or viewer access to the dataset via Admin Portal Groups will have their access transferred to Alteryx One.
Viewers that have been granted access to the dataset via “Public” Dataset Access (making the dataset accessible to all users in the workspace) will not have their access automatically transferred to Alteryx One. This dataset will need to be shared with all users requiring continued access to this dataset.
Dataset refresh schedules are configured via Alteryx One, and not within Auto Insights Admin Portal.Go to Schedule Data Refresh.
The dataset can be manually refreshed via the menu option on the Auto Insights Datasets page.
Editing of the dataset column configuration (column names, column attributes, measure sentiment, etc) is now available via the Columns page in Dataset Settings, and not via the Admin Portal.
The source (as shown in the Auto Insights Datasets page) will change from Auto Insights or Designer to Alteryx One.
Before your existing Auto Insights datasets can be connected to Alteryx One, you first need to configure Alteryx One with the respective data connections and/or datasets that Auto Insights will use.
Here are a few steps to connect to your data from Alteryx One:
Review dataset requirements—Review the recommendations for what types of data are most suitable for Auto Insights and the requirements for how your data should be structured. Go to Prepare Data.
Create connections—For each external datastore that contains data to be used in Auto Insights, you will need to create a connection from Alteryx One through which data will be accessed. Go to Connection Basics.
Connect to your data—When you import data into Alteryx One, you are creating a reference to a source of data. When the data is required for use (for example, in Auto Insights), Alteryx One reads the source data into the application for your use. Go to Connect to Data.