Get Started with Alteryx Designer
Basic Steps to Build a Workflow
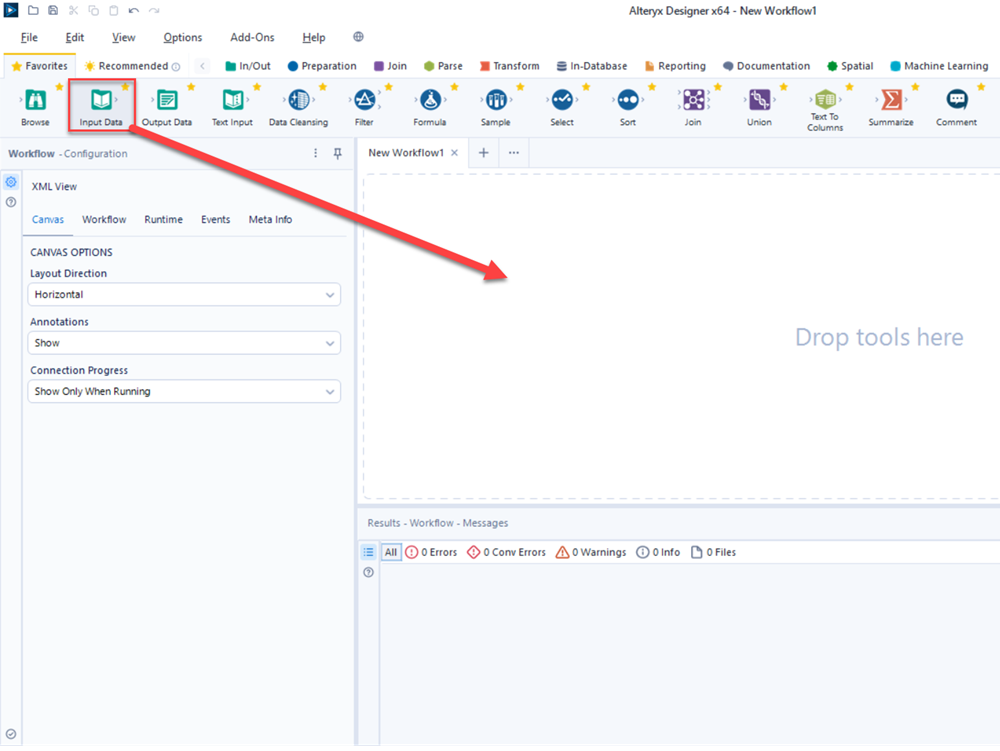
1. Drag a Tool
Select an Input Data tool in the tool palette and drag it to the workflow canvas area.
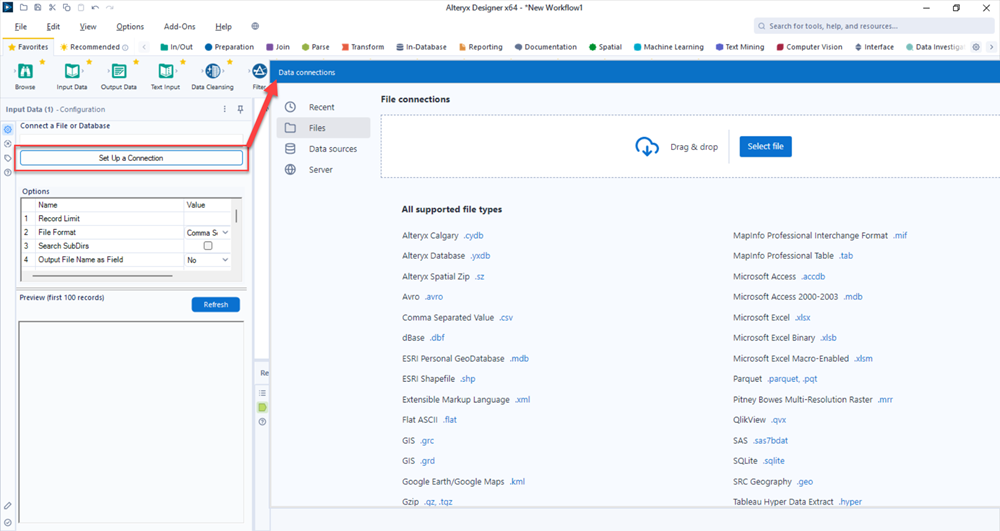
2. Connect to Data
Select a data source for the Input Data tool in the Configuration window. Select Set Up a Connection to upload an input file, connect to an external data source, or connect to Alteryx Server. For additional information, go to Input Data Tool and Supported Data Sources and File Formats.
3. Build a Workflow
Select and drag another tool to the canvas and configure it. Then drag additional tools to the canvas and connect them together. Go to Tool Categories and Build Workflows for more information.

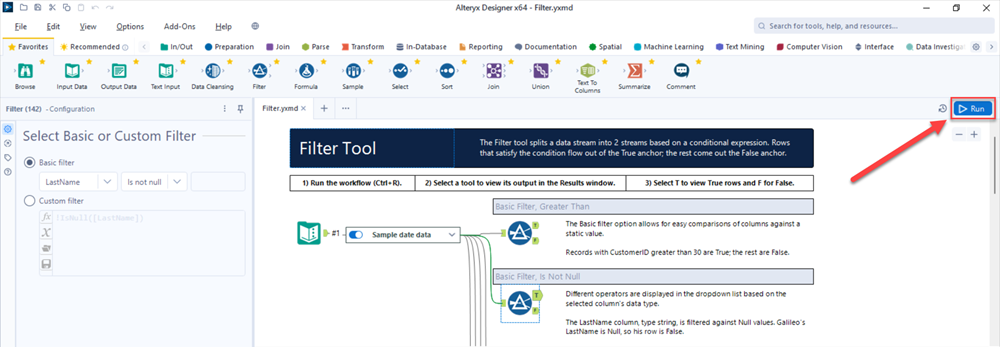
4. Run the Workflow
Select the Run button at the top of the canvas to process the data.
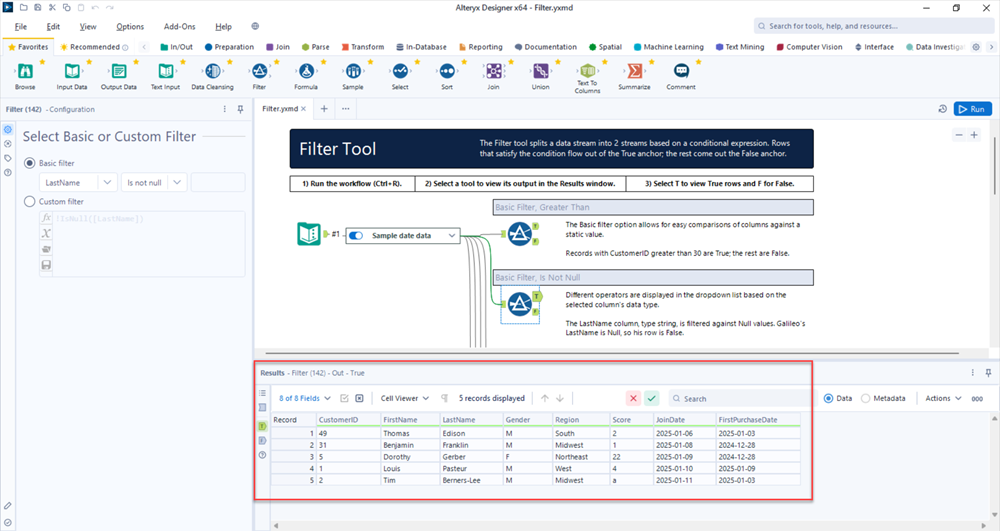
5. View the Results
After your workflow runs, you can view the output for each tool in the Results window below the workflow. Go to Results Window for details.
Additional Resources
Tutorials
In Designer, Go to Help > Tutorials to access tutorials that provide step-by-step instructions for building workflows.
Sample Workflows
In Designer, go to Help > Sample Workflows > Learn one tool at a time, to open workflows that demonstrate the use of specific tools. Additionally, many Designer tools have tool-specific example workflows. To access these, select the tool icon in the tool palette and select the Example Workflow link below the tool description.
Videos
Go to Alteryx Academy to view a variety of training videos that demonstrate how to use Alteryx Designer.