Alteryx Server Settings
On the Settings page of the Server Admin interface, you can edit your Configuration and Theme for your Alteryx Server.
Configuration
There are 4 categories of Server-level settings available to Server admins to configure on the Settings page of the Server Admin interface. These are user settings, asset settings, schedule settings, and security settings.
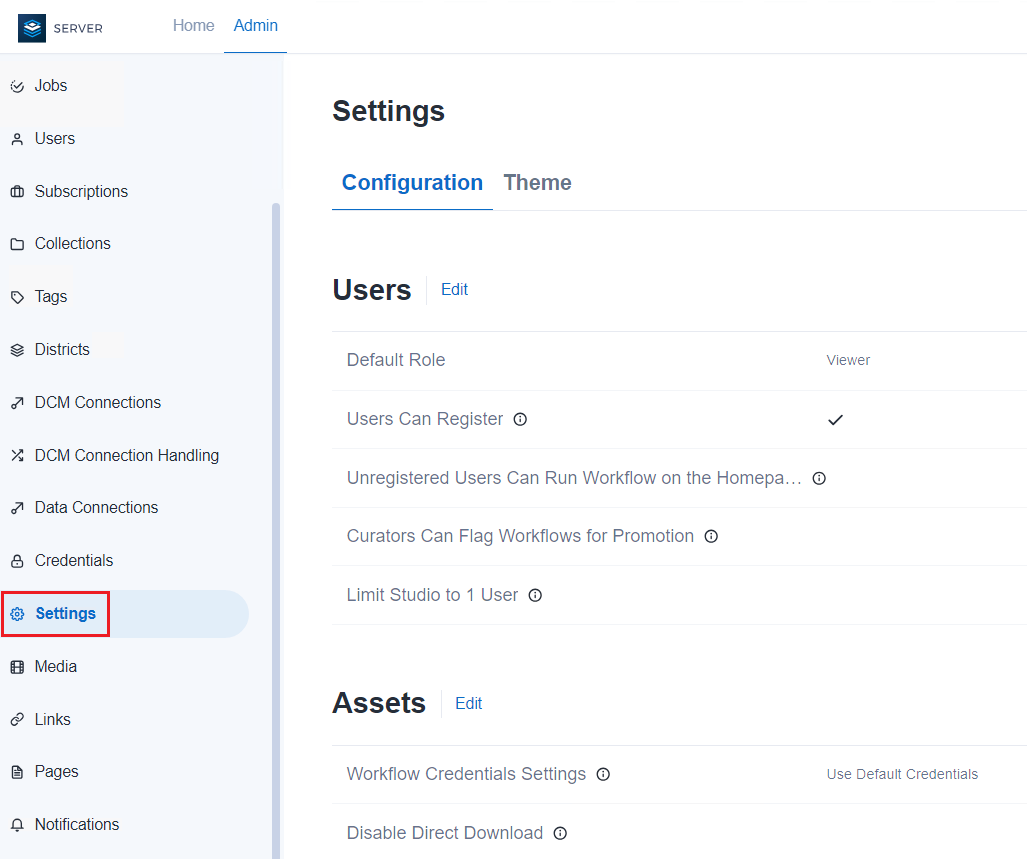
To manage Server-level settings, select Settings on the Admin toolbar, then select Configuration tab.
Users
There are 5 user settings on the Configuration tab.
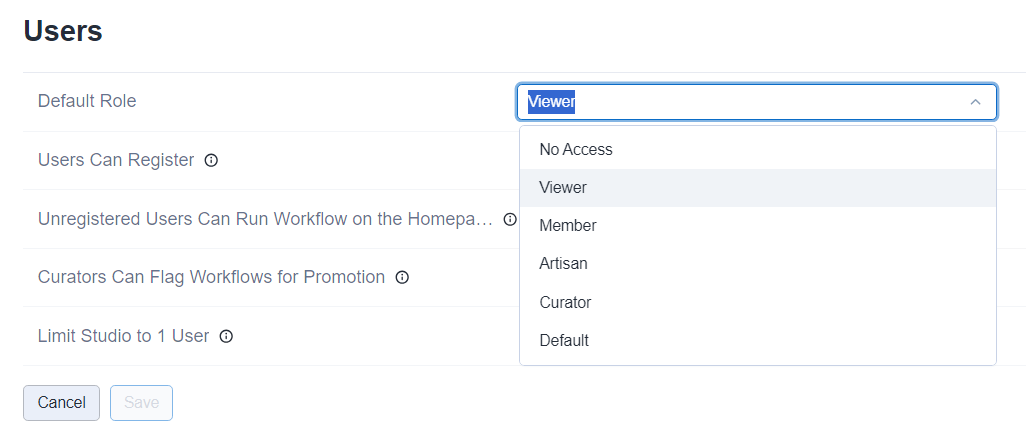
Default Role
The default user role is set to Viewer by default. To change the default role, select Edit and then use the Default Role dropdown. To confirm your changes, select Save. Go to the User Roles and Permissions help page to learn more about how roles are evaluated.
Users Can Register
By default, users are not allowed to sign up for access to your company's private Server. To allow users to sign up, select the Users Can Register checkbox. To confirm your changes, select Save.
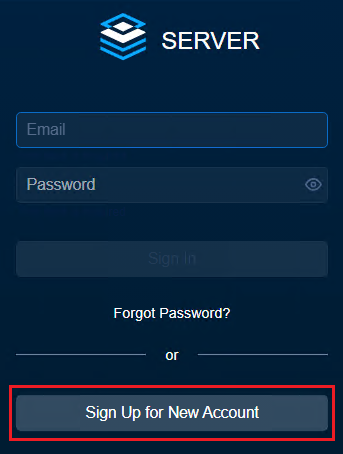
When enabled, users can sign up for a new account on the Server sign-in page. When disabled, the Sign Up for New Account is removed from the sign-in page. When the sign-up form is disabled, new users must be added by an Admin.
Note
Users Can Register is enabled by default for Servers configured to use Integrated Windows Authentication and can't be disabled.
We recommend enabling Users Can Register for Servers configured to use SAML Authentication.
This setting was previously Enable user registration on the Users page of the Server Admin interface.
Unregistered Users Can Run Workflow on the Homepage
By default, only users signed in to the Server can run workflows. When enabled, the Unregistered Users Can Run Workflow on the Homepage setting allows workflows placed in the company Server to be run without signing in.
This setting was previously Enable unregistered users to run Public Gallery workflows on the Workflows page of the Server Admin interface.
Curators Can Flag Workflows for Promotion
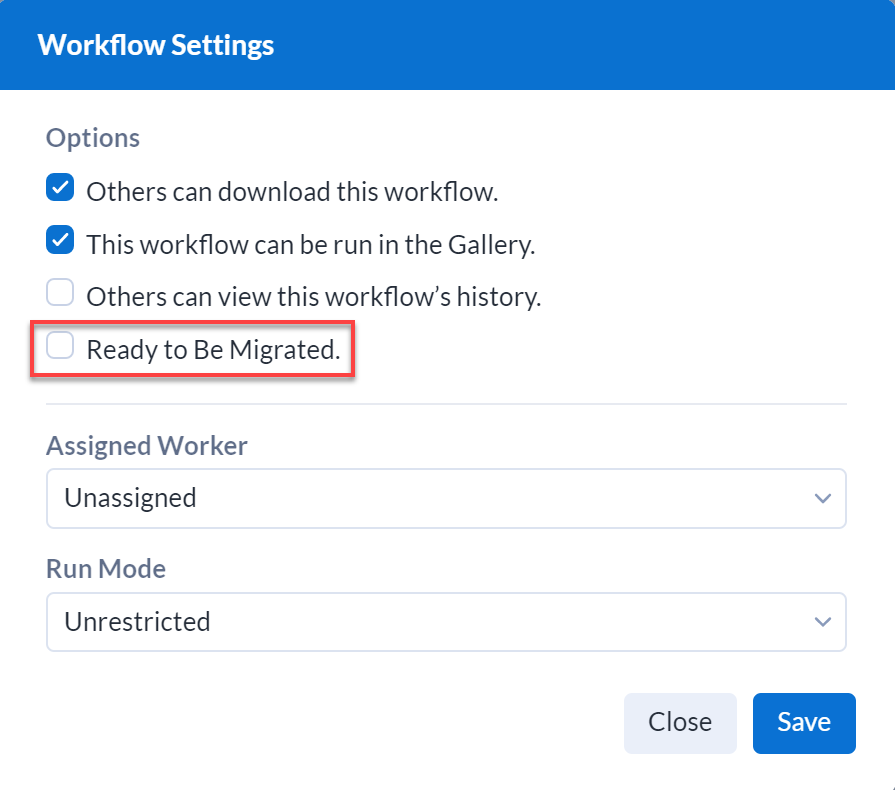
When enabled, Curators (Server admins) can indicate a workflow is ready to be promoted by enabling Ready to Be Migrated within a workflow. Go to the Enable Workflows for Migration help page to learn about workflow migration.
This setting was previously Enable workflows to be marked as ready for migration to a separate environment on the Workflows page of the Server Admin interface.
Limit Studio to 1 User
To turn off shared studios by limiting the users in a studio to 1 user, select the Limit Studio to 1 User checkbox.
Assets
There are 5 assets settings on the Configuration tab: Workflow Credentials Settings, Disable Direct Download, and Allow Access to Workflows Without Shared Credentials, Cancel Scheduled Jobs Running Longer Than, and Cancel Manual Jobs Running Longer Than.
Workflow Credentials Setting
The Workflow Credentials Settings determine the credentials required for running workflows at a Server-level.
Use Default Credentials: Runs all workflows using the default Run As account, which defaults to the LocalSystem account. The Run As account may be defined on any of the following process levels, listed in order of precedence:
Per studio subscription via Default Credentials.
Per Server worker node by adding a Run As account via Server System Settings.
Per Server via modification to Alteryx Service with the Windows Services Console.
Require User Credentials: Prompts users to enter their credentials when they run the workflow.
Allow Users to Select: Allows users to select credentials requirements when saving a workflow in Designer to a private Server. Options include:
User is not required to specify credentials
User must specify their own credentials
Always run this workflow with these credentials
Important
The credentials setting you select may require additional user permissions. For information on go to Configure Required Run As User Permissions.
Changing the credentials setting in these ways disables schedules in the Server:
Use Default Credentials to Require User Credentials.
Require User Credentials to Use Default Credentials.
Allow Users to Select to Require User Credentials, if users did not create schedules with credentials.
Allow Users to Select to Use Default Credentials, if users created schedules using their credentials.
This setting was previously Credentials setting for workflows on the Credentials page of the Server Admin interface.
Disable Direct Download
When enabled, Disable Direct Download removes the ability for Server users to download assets from the Server. Users can still download these assets from Designer.
Allow Access to Workflows Without Shared Credentials
When enabled, users are allowed to run workflows they have access to, without access to shared credentials.
Useful for admins who want to ensure the Server data connections in production environments that are connected to production data sets are not used to create new workflows in Designer, unless the connection is shared explicitly with the user.
It provides the flexibility for analysts (non-admins) to run workflows that use those connections in Server without having access to the connections and other data in Designer.
For more information about credentials, go to the Credentials help page.
Cancel Scheduled Jobs Running Longer Than
If necessary, use this setting to set a timeout for scheduled jobs that are running beyond certain amount of time. This applies to any jobs scheduled via the Server UI and Server APIs. Set the timeout in seconds, minutes, or hours.
Cancel Manual Jobs Running Longer Than
If necessary, use this setting to set a timeout for manual jobs that are running beyond certain amount of time. This applies to any jobs that individually ran via the Server UI or jobs triggered via the Server APIs. Set the timeout in seconds, minutes, or hours.
Schedules
Forecast Refresh Interval
Set a Forecast Refresh Interval for the Schedule Forecast. The default value is set to 1 hour.
For more information about how to refresh schedules and the forecast, go to the Schedule Forecast: Admin Interface help page.
Users Can Schedule Workflows
When checked, the Users Can Schedule Workflows Server-level permission enables users with the user-level Schedule Jobs permission to create and edit workflows. Both permissions must be enabled for a user to schedule workflows.
This setting was previously Enable users to schedule workflows on the Jobs page of the Admin interface.
Security
Allowed Log In Attempts
Set a number of Allowed Log In Attempts before a user is locked out.
Enforce Log In Attempt Timeout
To enforce a sign in attempt timeout, select the Enforce Log In Attempt Timeout checkbox.
Account Lockout Time (minutes)
Set the Account Lockout Time (minutes) to specify how long the user account will be locked after the user runs out of login attempts.
Allowed Hosts
In the Allowed Host field list the hosts you want to allow Server to serve. Use this as a security measure to prevent HTTP host header attacks. Enter fully qualified domain names (host/domain) 1 per line. Wildcards are allowed.
Important
If the host header does not match any value in this list, the exception page will be raised.
You are always able to access Server via localhost to prevent being locked out.
To be able to access Server, any hostname, fully qualified domain name (FQDN), DNS alias (for example, load balancer alias) has to be included on the list.
If the Allowed Host field is left blank, any host name is allowed.
Important
These settings apply to built-in authentication only. For more information about built-in authentication, visit the Configure Alteryx Server Authentication help page.
Restrict Public Workflow (Global)
To disable the functionality to make workflows public for users, select the Restrict Public Workflow (Global) checkbox. To enable this functionality, clear the checkbox.
By default, the checkbox is cleared, meaning the functionality to make workflows public for users is enabled.
If you have selected the checkbox, users will not see the Public Workflow toggle option on the Workflows page.
Note
For logged off and anonymous users, the Home page of Server still displays the Public tab, but without any workflows shown.
SCIM
If you are using SAML authentication, you can enable and configure the System for Cross-Domain Identity Management (SCIM) to allow you to manage users, group permissions, and Server access from your identity provider as single source of truth. For more information about SAML authentication and SCIM, go to Configure Alteryx Server Authentication.
To setup SCIM, select Edit.
SCIM Enabled: Enable the System for Cross-Domain Identity Management (SCIM) integration. SCIM is a standard for automating the exchange of user identify information. The SCIM integration is designed to work with SAML authentication.
Token: Authentication token used by your Identity Provider (IDP) to authenticate to the Server SCIM integration.
Expires: Expiration date and time of the current token. If expired, enter edit mode and select Save to generate a new token.
Token Lifetime: Determine how long a token is valid after you generate it. If you change this value, a new token is generated when you select Save.
Base URL/URI: Base address used to access the SCIM integration. Determined by the Web API Address defined in System Settings and not editable in the Server UI.
Canonical URL/URI: Optional. Alias address used to access the SCIM integration. Determined by the Canonical Web API Address defined in System Settings and not editable in the Server UI.
To confirm your changes, select Save.
Theme
On the Theme tab, brand the Server with your organization's name, logo, and colors. If you choose not to customize the Server, the default theme is used.
To update your Server theme, select Settings on the Admin toolbar, then select the Theme tab.
On the Theme tab, enter the Server name in Server Name. To enter the server name, select Edit. To confirm your changes, select Save. This is displayed to Server users as the Server name in the Sharing menus.
To change the logo from the Alteryx logo, go to Site Logo and select the pencil icon. Then choose a file and select an image file. To confirm, select Upload.
Supported file formats are PNG, GIF, JPEG, and JPE. Your image must be 200 KB or less. For best results, use images that are about 200x46 pixels. Images wider than 200 pixels will be resized.
In Site Colors select new colors for various elements. To edit the colors, select Edit. Then select the existing color to select a new color. If you want to reset the site colors, select Reset to Defaults, then select Save.
Refresh the Server to see your changes.