Transform a Column
The Transformer page provides several ways of rapidly transforming your data at the column level.
Tip
Except for finding and selecting columns, all of these actions add transformations to your recipe. After the step has been added, you can edit the recipe to adjust the step, including manually adding or removing columns.
Find Columns
For wide datasets, you can locate using either of the following methods.
Find by name
Steps:
In the Transformer toolbar, click the Find column icon.
In the Find column panel, begin typing the name of the column.
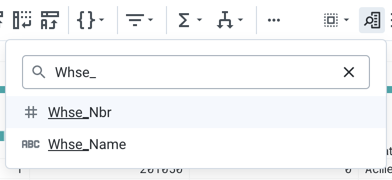
Figure: Find column panel
Select the column.
The data grid is moved to display the selected column on your screen.
Find in Column Browser
You may find it easier to use Column Browser to find and select columns for transformation.
Steps:
In the Transformer toolbar, click the Columns icon on the left side. Column Browser is displayed:
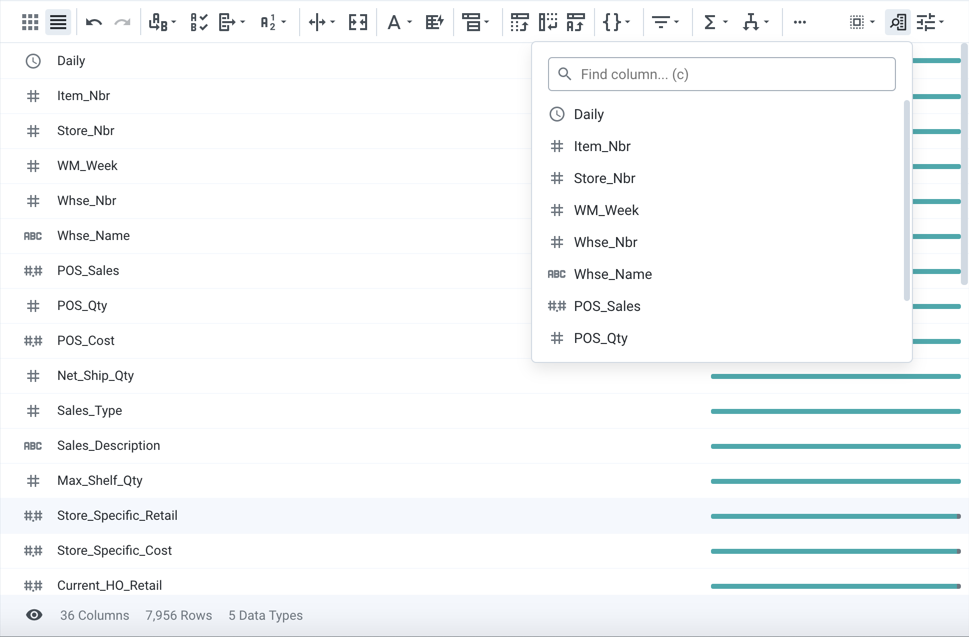
Figure: Column Browser
You can scroll the columns to select one or more columns for transformation.
Tip
The Find column panel can also be used to locate columns in this list.
Select Columns
When you locate a column or columns of interest, you can select using one or more of the following methods:
Click an individual column header to select the column.
Press
SHIFTand click to select consecutive columns.Press
CMD/CTRLto select multiple discrete columns.
A set of suggestion cards is displayed on the right side that reflect the column or columns that you have selected.
Column menu
When you select a single column, you can explore additional transformations through the column menu.
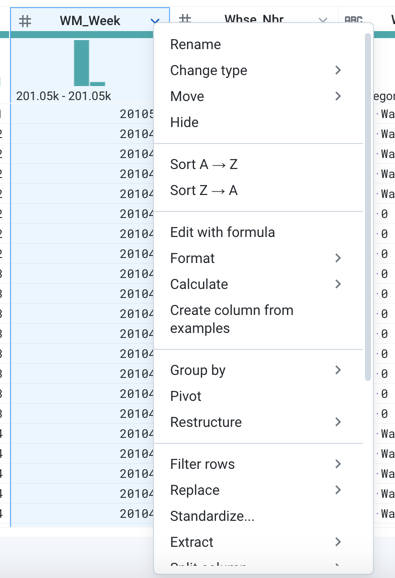
Figure: Column menu
The options available in the column menu depend upon the currently selected data type of the column. For example, the options for Integer columns are different than the options for String columns.
Tip
The displayed column menu applies only to the column from which it was opened. You cannot apply column menu transformations to multiple columns, although you can modify the transformation after it has been added to your recipe to apply to multiple columns.
Cut, Copy and Paste Columns
Steps:
Click the Columns icon in the Transformer toolbar.
In Column Browser, select the header of the column.
From the column menu, select Cut or Copy.
Select the column where you wish to paste the column.
Right-click and select the appropriate Paste option: before, after, or paste values.
Move Columns
You can move one or more columns to a new location in your dataset.
Steps:
Click the Columns icon in the Transformer toolbar.
In Column Browser, select the column or columns to move.
Right-click and select the appropriate Move option:
To beginning: Columns are moved to the beginning of columns in the dataset.
To end: Columns are moved to the end of columns in the dataset.
Before/after: In the Transform Builder, you can specify exactly where you wish to move the columns.
When the transformation is added to your recipe, the columns are moved.
Rename Columns
You can rename one or more columns in a single step.
Steps:
In the Transformer toolbar, click the Grid icon.
In the data grid, click the name of the column.
In the data grid, select Renamefrom the column menu.
Change the name as needed.
In the Transform Builder, you can add additional columns to be renamed.
Click + Add.
Enter the name of a column to rename.
Enter the new name.
Repeat as needed.
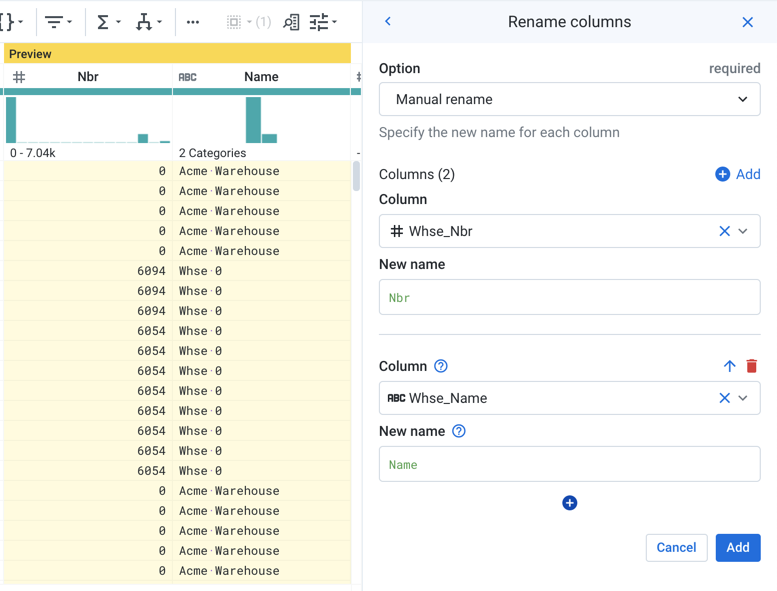
Figure: Rename multiple columns
When the columns have been renamed, click Add to add the step to your recipe.
Change Column Data Type
By default, Designer Cloud attempts to infer a column's data type based on the data contained in it.
A data type defines the expected values in a column. For example, when Designer Cloud detects numeric values in a column, the column may be assigned the Integer data type or the Decimal data type, depending on the data in it.
In some cases, you may need to re-assign a column's data type. For example, if you are modifying values and sub-values in the column, you may find it easier to work with the data temporarily setting it to String data type.
Tip
To change the data type of multiple columns to the same type, you may find it easier to use the Column Browser. Select the columns. Then, right-click the select and select the appropriate type from the Change type menu.
Steps:
If you are changing the data type for a single column, select the column header.
From the data type menu, select the new type:

Figure: Change data type
A step is added to your recipe to change the selected column to the new type.
Tip
You can edit the recipe step to apply the new data type to more columns.
Edit Column
You can modify the contents of a column through transformation.
Steps:
Select the column. From the column menu, select Edit with formula.
The Edit with Formula transformation is displayed in the Transform Builder:
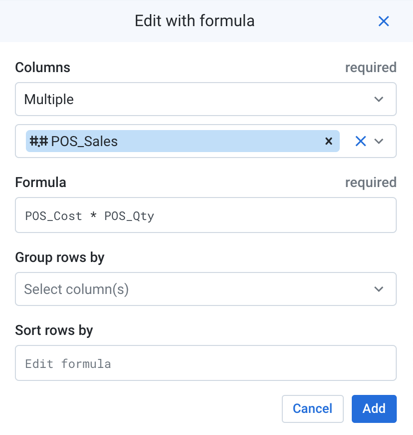
Figure: Edit with formula
Formula: Enter a valid formula. You can edit functions, column references, constants, or combinations of these objects.
Group rows by: The formula can be calculated based on the groupings of values of a selected column. For example, you may wish to compute based on separate values in the
Regioncolumn.
To edit the column with the new formula, click Add.
Delete Columns
Select the column or columns. From the column menu, select Delete.
Tip
To restore the columns, you can click the Undo icon immediately in the Transformer toolbar, or you can delete the recipe step through the Recipe panel.
Merge Columns
You can concatenate non-numeric data together from multiple columns into a new column. You can apply this technique to columns of different un-nested data types.
Steps:
In the Transformer page, identify the columns that you wish to merge.
Click theMerge columnsicon in the toolbar.
Tip
You can also search for
Merge columnsin the Search panel.In the Merge columns transformation, enter the required details:
Columns: The columns containing the values you wish to merge. You can select from the following options:
Multiple: Select one or more columns from the drop-down list.
Range: Specify a start column and ending column. All columns inclusive are selected.
All: Select all columns in the dataset.
Note
This option merges the data in all of the columns into a new single column.
Advanced: Specify the columns using a comma-separated list. You can combine multiple and range options under Advanced. Example:
c1,c3,c5~c8
Above specifies the following columns:
c1,c3,c5,c6,c7,c8.
Separator: The separator to be placed between each value. This value can be empty.
New column name: The name of the new column.
To add the step to your recipe, click Add.
The new column is added to your dataset.
As needed, you can delete the source columns.