File Settings
When you generate file-based results, you can configure the filename, storage format, compression, number of files, and the updating actions in the right-hand panel.
Note
By default, when scheduled or API jobs are executed, no validations are performed of any write settings objects for file-based outputs. Issues with these objects may cause failures during transformation or publishing stages of job execution. Jobs of these types should be tested through the Cloud Portal first. A workspace administrator can disable the skipping of these validations.
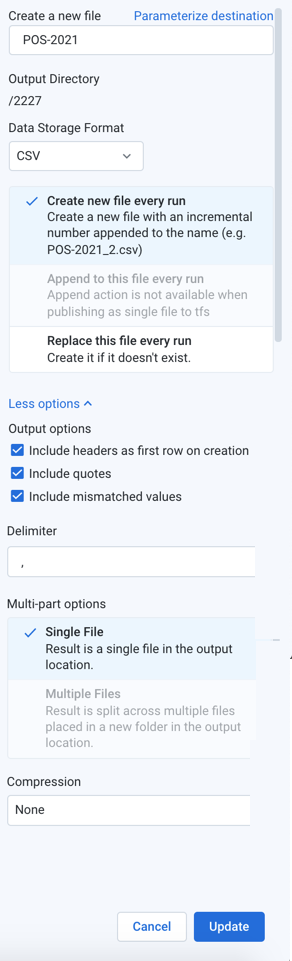
Figure: Output File Settings
Configure the following settings.
Create a new file: Enter the filename to create. A filename extension is automatically added for you, so you should omit the extension from the filename.
File output paths can have a maximum length of 2048 characters.
Output directory: Read-only value for the current directory. To change it, navigate to the proper directory.
Note
During job execution, a canary file is written for each set of results to validate the path. For datasets with parameters, if the path includes folder-level parameterization, a separate folder is created for each parameterized path. During cleanup, only the the canary files and the original folder path are removed. The parameterized folders are not removed. This is a known issue.
Data Storage Format: Select the output format you want to generate for the job.
Avro: This open source format is used widely for data serialization and data transfer between systems.
CSV and JSON: These formats are supported for all types of imported datasets and all running environments.
Note
JSON-formatted files that are generated by Designer Cloud are rendered in JSON Lines format, which is a single line per-record variant of JSON. For more information, see http://jsonlines.org.
Parquet: This format is a columnar storage format.
HYPER: Choose HYPER to generate results that can be imported into Tableau.
For more information, see Supported File Formats.
Publishing action: Select one of the following:
Note
OTE: If multiple jobs are attempting to publish to the same filename, a numeric suffix (
_N) is added to the end of subsequent filenames (e.g.filename_1.csv).Note
If a single user executes two jobs with the same output settings except for different methods (e.g. create vs. replace) on the same output destination, the generated results and potential error conditions are unpredictable. Please wait for the first job to complete execution before changing the configuration for the second job.
Create new file every run: For each job run with the selected publishing destination, a new file is created with the same base name with the job number appended to it (e.g.
myOutput_2.csv,myOutput_3.csv, and so on).Append to this file every run: For each job run with the selected publishing destination, the same file is appended, which means that the file grows until it is purged or trimmed.
Note
The
appendaction is not supported when publishing to S3.Note
Compression of published files is not supported for an
appendaction.Replace this file every run: For each job run with the selected publishing destination, the existing file is overwritten by the contents of the new results.
More Options:
Include headers as first row on creation: For CSV outputs, you can choose to include the column headers as the first row in the output. For other formats, these headers are included automatically.
Note
Headers cannot be applied to compressed outputs.
Include quotes: For CSV outputs, you can choose to include double quote marks around all values, including headers.
Include mismatched values: For CSV outputs, you can choose to include any value that is mismatched for its column data type. When disabled, mismatched values are written as null values.
Delimiter: For CSV outputs, you can enter the delimiter that is used to separate fields in the output. The default value is the global delimiter, which you can override on a per-job basis in this field.
Tip
If needed for your job, you can enter Unicode characters in the following format:
\uXXXX.Single File: Output is written to a single file. Default setting for smaller, file-based jobs.
Multiple Files: Output is written to multiple files. Default setting for larger file-based jobs.
Compression: For text-based outputs, compression can be applied to significantly reduce the size of the output. Select a preferred compression format for each format you want to compress.
Note
If you encounter errors generating results using Snappy, additional configuration may be required. See Supported File Formats.
To save the publishing action, click Add.