Plan View Page
In Plan View, you design your plan, which includes the building and sequencing of tasks and the triggers that execute your sequence of tasks.
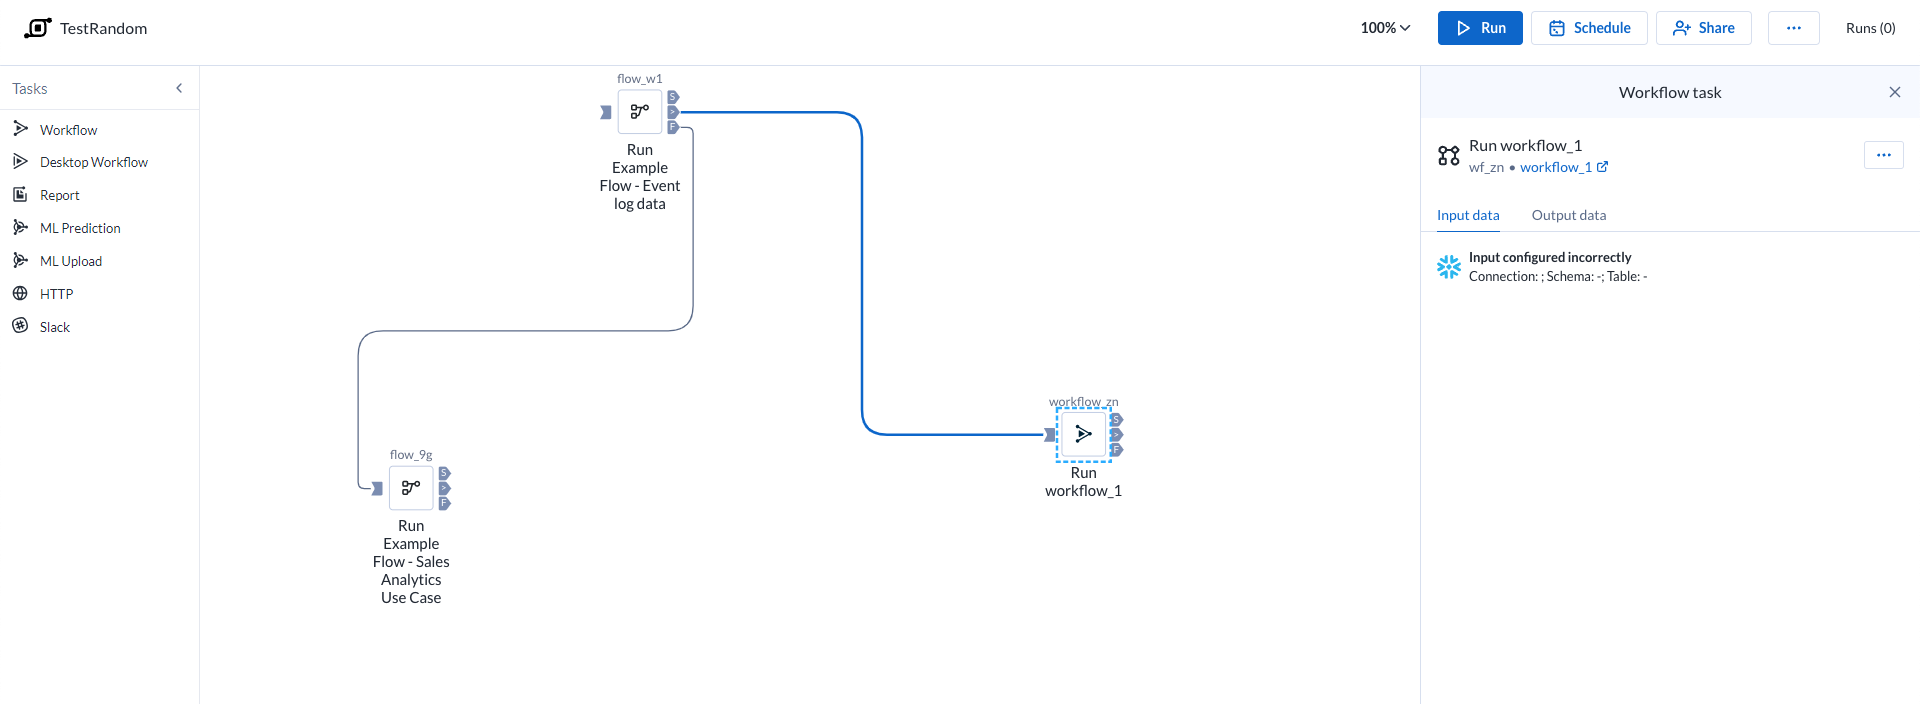
Figure: Plan view page
Top Bar
Suggerimento
To rename the plan, click the plan name in the top bar.
Zoom Options:
You can zoom the plan canvas to display areas of interest in the plan graph.
The zoom control options are available on the right side of the canvas. The following are the available zoom options:
Suggerimento
You can use the keyboard shortcuts listed in the zoom options menu to make quick adjustments to the zoom level.
Zoom in: Zoom in 10% on the canvas to focus on greater detail.
Zoom out: Zoom out 10% from the canvas to see more of it.
Zoom to fit: Change the zoom level to fit all of the objects of your plan onto the screen.
25%, 50%, or 100%: Change the zoom level to one of the preset levels.
Other options:
Run: Run the plan. You can track the progress of your plan run. Go to Plan Run Details Page.
Suggerimento
You can apply overrides to parameters through the Parameters tab. Go to Plan Runs Page.
Supporto di parametrizzazione limitato
Plans al momento supporta solo la parametrizzazione per i flussi Trifacta Classic.
Schedule: Create or edit the plan schedule with one or more triggers through the right context panel. Go to Plan View for Triggers.
Share: Share the plan with other users. Go to Share a Plan.
Runs: The Runs link tracks the current total number of runs that have been queued or executed for this plan. Click this link to track the progress on your plan run.
Plan context menu
Rename: Modify the name and description for your plan.
Parameters: You can apply overrides to the parameters for your plan tasks during plan job runs. Go to Manage Parameters Dialog for Plans.
Supporto di parametrizzazione limitato
Plans al momento supporta solo la parametrizzazione per i flussi Trifacta Classic.
Email notifications: Send email notifications on the plan runs. Go to Manage Plan Notifications Dialog.
Export: Export the plan from Alteryx Analytics Cloud (AAC). Go to Export Plan.
Transfer ownership: (Available to owner or admin only) Transfer ownership of this asset to another user. Go to Transfer Asset Ownership.
Delete: Delete your plan.
Task
To add a task:
Drag and drop the required tasks from the left pane to the Plan canvas.
Depending on what you select from the left pane, the corresponding task options are displayed in the right panel.
Set the required information. The required task is updated on the plan canvas.
For more information, Go to Create a Plan.
Task Execution Rule
Icon | Description | |
|---|---|---|
| Success | |
| Failure | |
| Any status | |
| Input Anchor |


You can gate the execution of a task based on the completion status of its previous task. To execute the task, click and join the required icons to the output anchor of another task. You can also drag the required icon to the output anchor of any task. See the icons above.
On success: Runs if the previous task is successful.
On failure: Runs if the previous task is failed.
On execution (any status): Runs the task in the canvas irrespective of the previous task's status (success or failure).
View for Tasks
When you create or select a task, you can modify its settings through the context panel on the right.
Task context menu options:
Some options may not be available for specific task types.
Edit name: Modify the name of the task.
Delete: Delete the task from your plan.
Tipi di attività
Sono disponibili i seguenti tipi di attività.
Attività del flusso di lavoro : un'attività di questo tipo consente di eseguire uno dei flussi di lavoro di Designer Cloud nell'ambito di un piano creato nella Alteryx Analytics Cloud.
Attività del flusso di lavoro Desktop : consente di organizzare l'esecuzione dei flussi di lavoro Designer Desktop caricati su Alteryx Analytics Cloud.
Attività del report : consente di creare ed esportare un report a partire dai dati preparati e combinati in AAC. Vai a Plan View for Report Tasks.
Attività del flusso : per ulteriori informazioni, consulta la sezione Visualizzazione piano per le attività del flusso .
Attività di previsione ML : consente di fare previsioni sui nuovi dati con il progetto Machine Learning.
Attività di caricamento ML : consente di caricare nuovi dati di addestramento nel progetto Machine Learning.
Attività HTTP : richiesta inviata a un server di terze parti nell'ambito dell'esecuzione di un piano.
Attività Slack: invia un messaggio con informazioni sul piano eseguito a un canale Slack specificato.
Attività di Location Intelligence : orchestra i progetti di Location Intelligence con altre attività. Per ulteriori informazioni, consulta la sezione Plan View for Location Intelligence Tasks.
Auto Insights task: Refresh data in one of your Auto Insights Datasets. For more information, go to Plan View for Auto Insights Tasks.
To cancel a plan that is currently running, click Cancel plan run.