Share Flow Dialog
You can manage access to a flow for other users through the Share Flow dialog. In Flow View, select Share from the context menu.
When you grant another user access to one of your flows, you both can work on the objects of the flow. You can take turns editing the recipes, which allows the team to more rapidly complete the work.
Note
When a user is given access to a flow, that user is considered a collaborator on the flow and has a smaller set of permissions than the owner of the flow.
Note
Any user may be given access to a flow. However, this user must have access to the underlying data. If the imported dataset is accessed from a private location, the user cannot access datasets in the shared flow. For more information, see Share Connection Dialog.
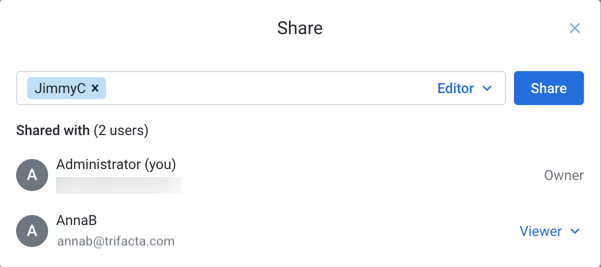
Figure: Share Flow Dialog
Find users:
To add users as collaborators in your flow, start typing the name of a user with whom you'd like to collaborate. Select the user. Repeat this process to add multiple users.
Tip
You can paste a comma-separated list of email addresses to share to multiple users at the same time.
Note
For privacy reasons, search may not be available in some environments.
Set access level:
For each user, you can configure their level of access to the shared flow:
Note
You cannot set a user's access to a level that is higher than the limit set for the user at the workspace level. For example, if the user has Viewer access to flows at the workspace level, you cannot make the user an Editor on your flow.
Note
Workspace administrators have Owner-level access to all flows in the workspace. You do not need to share flows with them.
Editor:Modify the flow.
Share the flow.
All Viewer privileges.
Viewer:Read-only access to the flow.
Run jobs in the flow.
For more information, see Overview of Sharing.
To save your changes, click Save.
Each selected user now can access the flow through their flows page. See Flows Page.