Create Role
Note
This feature may not be available in all product editions. For more information on available features, see Compare Editions.
Administrators can create and assign roles to users to govern access to user-created objects in the Dataprep by Trifacta platform.
A role is a set of privileges that can be assigned to users.
A privilege governs access level to a type of object.
By default, all users are assigned the
defaultrole, which allows users to use the user-created object types.For more information, see Privileges and Roles Reference.
As needed, you can create user roles to define different access levels for different object types.
Note
You must be an administrator to create new roles.
Note
Roles are additive. If you assign multiple roles to a user account, the user receives the highest level of access for each privilege among the assigned roles.
Note
When a role is assigned, unassigned, or modified, the changes to privileges are immediately applied to the associated user accounts. A new login is not required.
Create Role
To create a new role, please complete the following steps.
Steps:
In the left nav bar, select User menu > Admin console > Roles.
In the Roles page, review the list of available roles. For more information, see Roles Page.
To create a new role, click Create Role.
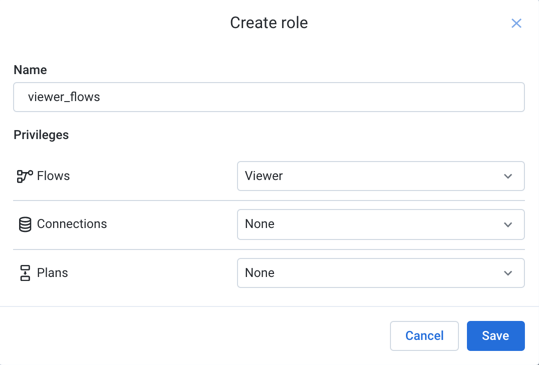
Figure: Create Role dialog
In the Create Role dialog, specify the following:
Name: Enter a name for your role. This value must be unique among available roles.
Privileges:
For each of the available object types, specify the access level for the role.
For more information on these privileges, see Privileges and Roles Reference.
To create the role, click Save.
The role is now available and can be assigned to users. See below.
For more information, see Create Role Dialog.
Example - Read-only access role
Suppose you wish to limit a set of users to read-only access to role-based objects.
Steps:
In the Roles page, click Create role.
In the Create Role dialog, enter the following:
Name:
read-onlyPrivileges: For each available privilege, select
viewer.Note
Some privileges may not have a
vieweraccess level. For these privileges, you should selectnone. However, users with such a role cannot access the pages where these objects are listed.
Click Save.
The role is now available and can be assigned to users. See below.
Example - Flows-only access role
Suppose you wish to limit a set of users to only be able to work with flows. These users should be able to view, share, edit, schedule, run jobs, and delete flows.
Steps:
In the Roles page, click Create role.
In the Create Role dialog, enter the following:
Name:
flows-onlyPrivileges:
For the flows privilege, select
author.For every other privilege, select
none.
Click Save.
The role is now available and can be assigned to users. See below.
Example - Empty role
In some circumstances, you may wish to assign an empty role to a user. For example, you may wish to limit some administrators to only be able to configure aspects of the platform without providing access to any user-created objects.
Steps:
In the Roles page, click Create role.
In the Create Role dialog, enter the following:
Name:
emptyPrivileges:
For every privilege, select
none.
Click Save.
The role is now available and can be assigned to users. See below.
Assign Role
After a role has been created, you can assign it to users.
Note
Assigning a role adds the role to the user's account. It does not replace any role that is already present in the account.
Note
When you assign or unassign a role, the privileges are immediately applied to the assigned user's account. The user does not need to re-login to see the changes.
Steps:
In the Roles page, locate the role to assign.
On the right side of the screen, click the context menu for the role. Select Assign role....
In the Assign role dialog, enter a list of email addresses for users to whom you wish to assign the role.
Click Assign.
The role and its associated privileges are applied immediately to the user account(s).
Modify Role
After a role has been created, you can modify it as needed.
Note
When the privileges of a role are modified, the changes are applied immediately to all users who are currently assigned the role. Before making modifications, you should review the users who could be affected. See Role Details Page.
Steps:
In the Roles page, locate the role to modify.
In the context menu on the right side of the page, select Edit.
Review the privileges assigned to the role, and make any changes as necessary.
Click Save.
All users who currently have the role in their account immediately receive the changed privileges.
Example - Modify default role
Tip
If you are changing the privileges of a role, you might want to create a role that contains only the replaced privileges. For example, if you are changing access to flows in Role A from author to editor, you might create a new role first, which contains only the author privilege for flows. If a user needs to be able to create new flows, you can then assign the new role accordingly.
Suppose you wish to reduce privileges for the default role, which is assigned to all users. At the same time, some user should be assigned author-level access to the available objects. Here is the following general flow for managing this modification.
Note
You cannot modify the name of the default role.
Steps:
Before you begin, you might wish to inform users that you are making these changes. In some cases, users may lose access to objects that they have created.
Create new roles for author access to each object type. For more information, see Roles Page.
For example, you can create the
Flow Authorrole, which hasauthorprivilege for flows and no other privilege. Optionally, for the other privileges, you could providevieweraccess, which enables read-only access.Repeat the above for each type of object for which there is a privilege.
At this point, the new roles have been created.
Assign these roles to users as needed. For example, for the
Flow Authorrole, you can assign it to each user that must create flows.Tip
Since roles are additive, you have not removed any privileges yet.
Now, you can modify the
defaultrole.In this case, you should decide what is the baseline set of privileges that each new user should have. Set the privileges to the lowest level of common access.
Unassign Role
Use the following steps to remove a role from a user account.
Note
Removing a role from a user account may remove access to objects that the user has created. If the user is the owner of these objects, some access may be removed permanently, even if the object is shared. For more information, see Overview of Sharing.
Steps:
In the Roles page, locate the role that you wish to remove from one or more user accounts.
Select the role.
In the Role Details page, click the Users tab.
Locate the user to un-assign the role. In the context menu for the user, select Unassign from role.
The user no longer has the role in the account.
For more information, see Role Details Page.
Delete Role
Warning
You are permitted to delete roles that are still assigned to users. Deleting a role removes the role from all user accounts and cannot be undone. Before you delete a role, you should review the list of affected users and the objects to which they have access.
Steps:
In the Roles page, locate the role to delete. In the context menu, select Delete.
Confirm the deletion.
The role is deleted. All users who had the role can no longer access the privileges assigned in the role.
See Roles Page.