Time Comparison
Everything you need to know about setting the correct time comparison to pull out the insights that matter to your business.
What is the time comparison feature all about?
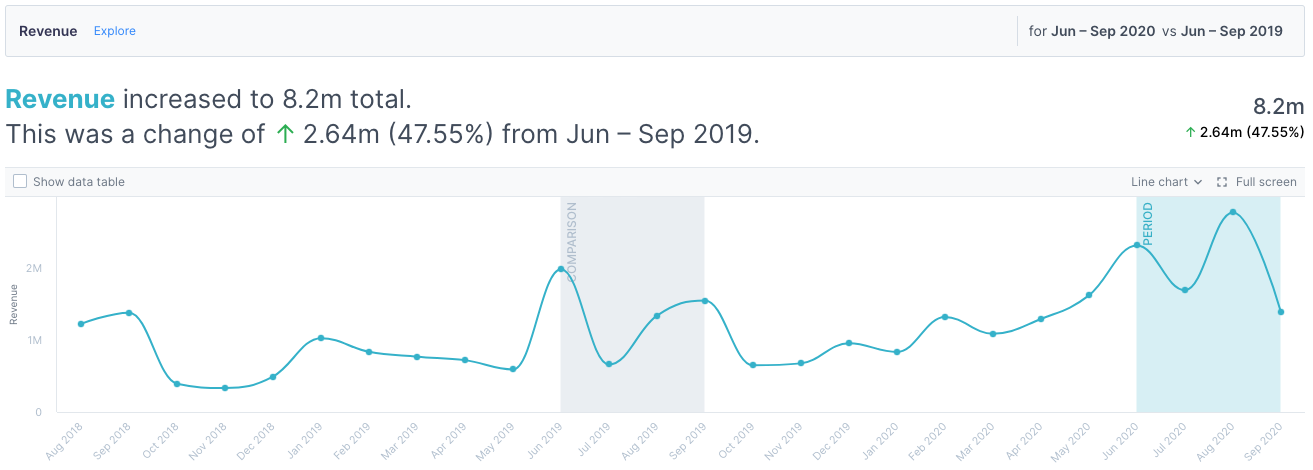
Comparing time gives you additional context about your data; say, if you know that sales are at 8.2 million, you would not know if it’s a good or bad thing until you compare it against something.
With the flexibility in our time comparison module, you can now determine the focus period (blue) you want to understand further and compare it against a comparison period (grey).
Why don’t I see a time comparison?
You only see time comparisons if your dataset contains time series data.
What are the preset time comparisons available?
We have the following preset time comparisons available:
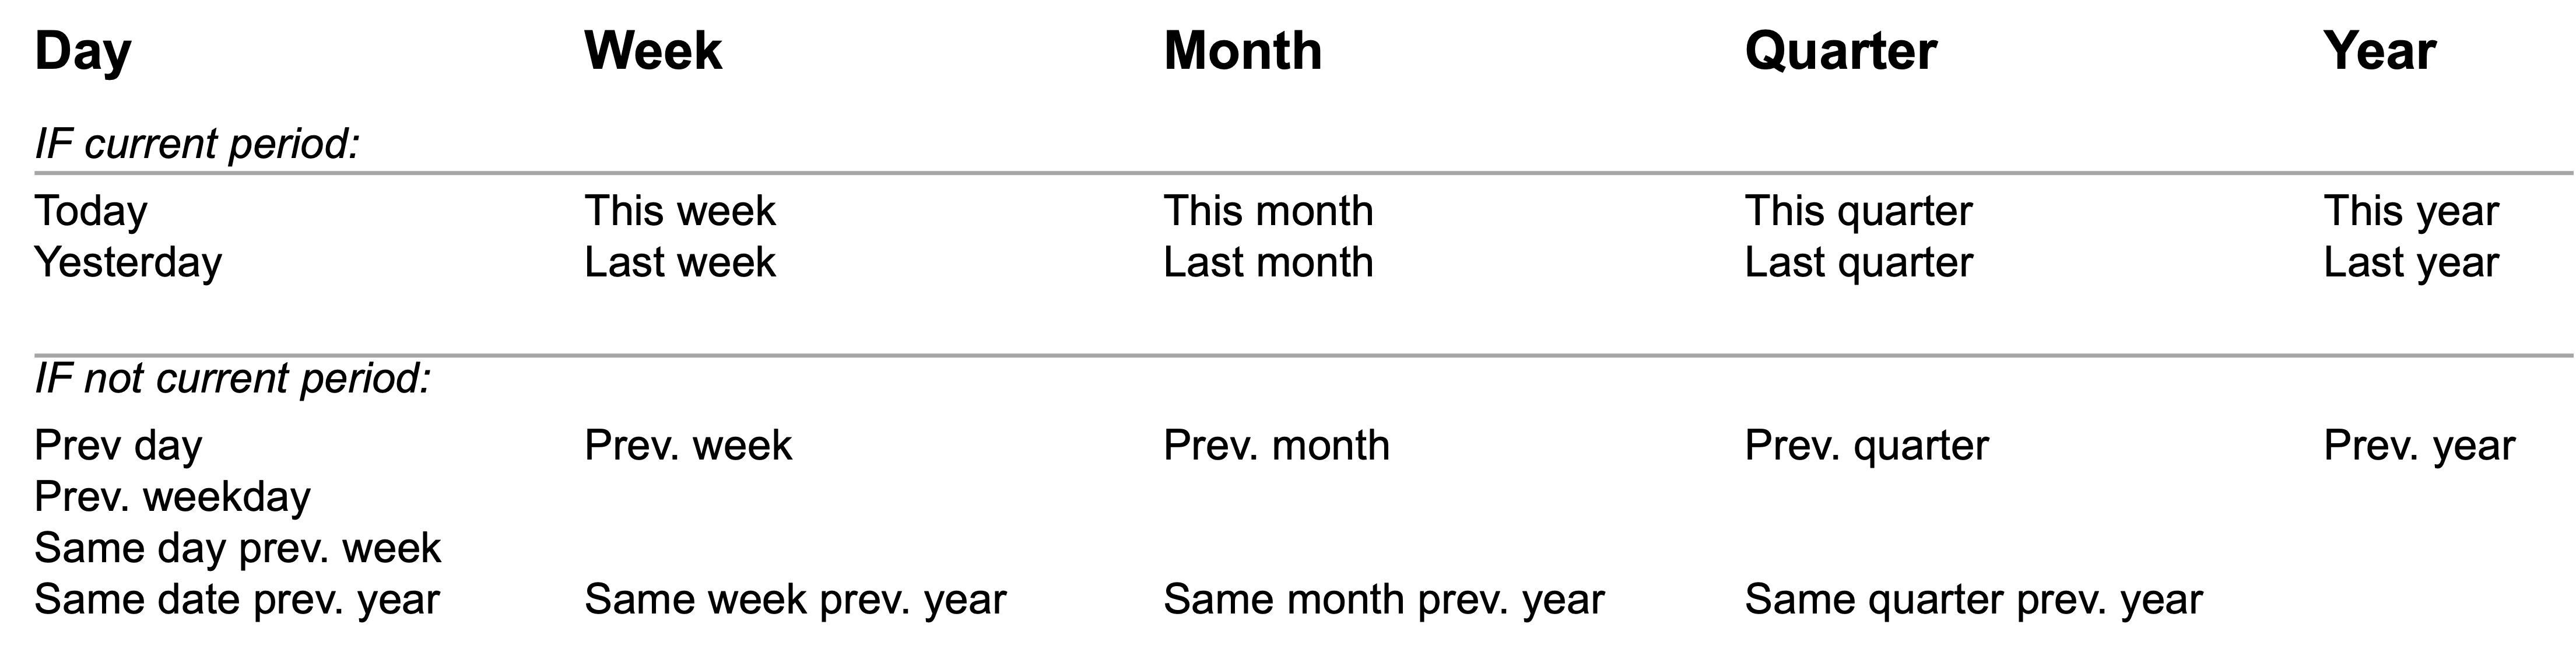
Suppose you are not able to find some of the preset comparisons available. In that case, it means that your dataset cannot handle that comparison. For example, a monthly dataset would not be able to have a week-to-date view.
If you want to compare other periods apart from the preset comparisons available, please refer to the rolling range/fixed range section.
How do I change the time comparison?
If you have edit rights to the Preset Report, you can change the time comparison in Edit Mode from the Query Bar. This change will be saved for the specific page you’ve edited.

If I share my Preset Report with my colleague, can my colleague customize the time comparison too?
If they have read-only rights to your Preset Report, they can change the time comparison in Explore Mode from the Query Bar. However, this change will not be saved the next time they log in.
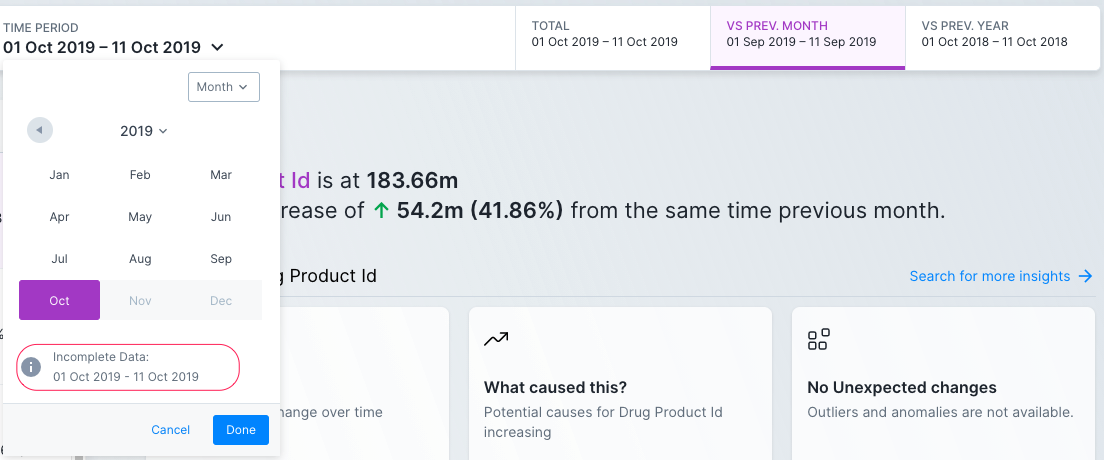
Why does my preset time period show the past month’s data instead of the latest month?
The latest period data is likely incomplete; hence, Auto Insights will default to the latest full-time period.
An example would be if you have data until 8 Sept, but Auto Insights defaults the latest month comparison period to August, because September’s data is incomplete.
What if I want to compare it by financial year instead of calendar year?
Update the Year type from“Calendar Year” to“Financial Year”. You will notice that the preset time comparisons will adjust accordingly, i.e., This financial quarter (QTD), This financial year (YTD), etc.

How do I change the page to focus on the correct date range if I have multiple dates?
Like above, select the specific date range you want to use. For example, from Booking Date to Travel Date.
What is a rolling range, and how is it different from a fixed range?
A rolling range comparison analysis gives you an ongoing analysis. For example, when there’s a data refresh, the analysis will change to consider the new data.
A fixed-period comparison analysis provides a point-in-time comparison and will not change as time progresses or when data is refreshed.
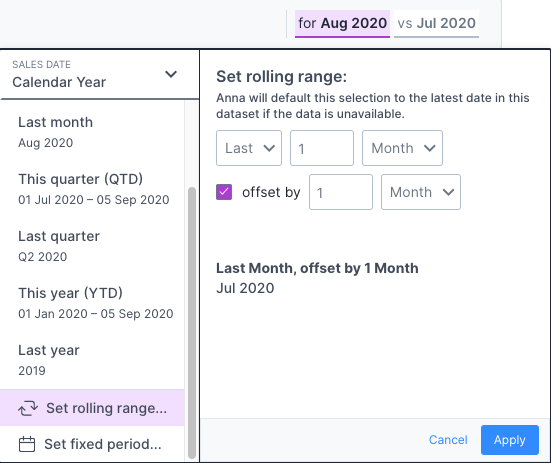
What does the offset feature in rolling range mean?
The offset feature is used when you would like to define a delay in the reporting dates. A typical use case would be that you want to have a monthly review that reports on the previous month, you will use this offset feature to delay it by 1 month.
For example, current data is up to Aug 2020, but the business wants to review performance in Jul 2020 instead.
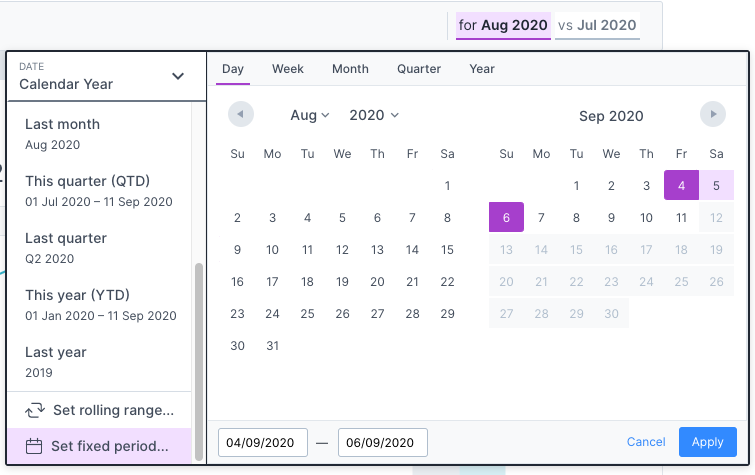
How do I set a fixed period properly?
2 main steps to remember:
Set the focus period that you would like to focus your analysis on
Set the comparison period that you would like to compare against
You perform these 2 steps by selecting the underlined time periods in the Query Bar.
This example shows you how to select the latest weekend for a focus period.
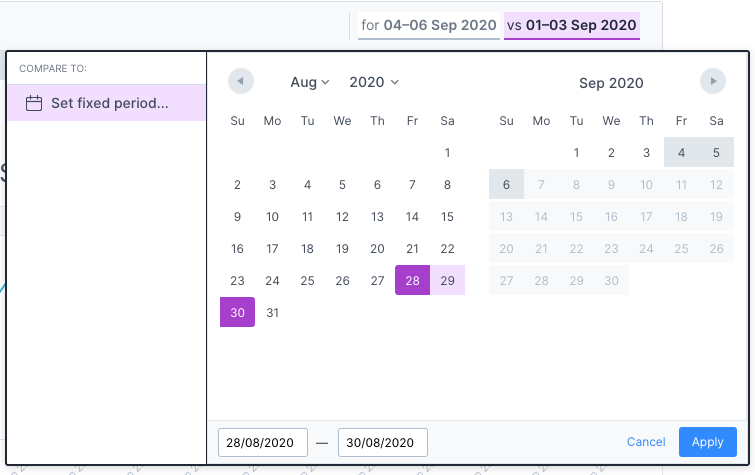
This example shows you how to select the previous weekend for a comparison period.
What is General Period to Date (XTD)?
XTD allows you to view insights for your latest data and compare them to the previous complete period or previous year across:
Week to Date (WTD)
Month to Date (MTD)
Whether or not a measure can have a WTD or MTD variance depends on its granularity. For example, a dataset with monthly data cannot use WTD.
While selecting an incomplete period, Auto Insights will highlight that it is incomplete with the date range. If that’s expected, click Apply for Auto Insights to start analyzing.
If you want other comparison periods instead of the incomplete date range for the previous period, read more here to learn how to achieve that analysis.