The Maintenance section provides information about scheduled tasks and staged entries. Additionally, you can perform various types of reindex and run scripts using the script console.
Under the Jobs tab you can find the Jobs section listing the various data source loader jobs and Scheduled Tasks section allowing to schedule various jobs to run.
The Jobs section lists the various data source loader jobs.
Select one or more jobs and select Synchronize to update the content for the selected jobs. For example, if you have deleted the staged tables for a data source from the Stage page, those objects will remain in Alteryx Connect until the job for that data source is synchronized.
The task scheduler allows administrators to schedule various jobs to run.
Select Create to open the Task window.
Enter the Task name.
Select the Job type.
Enter the Job target.
Enter a Cron expression to configure the job schedule details.
Cron Expressions in the Scheduler
If the expression entered has "*" in the seconds position, the scheduler will run repeatedly until the minute value no longer fulfills the condition.
To run the job once, enter "0" in the seconds position.
6. Select Save to save the job.
Staged entries represent loaded source system stage tables in Alteryx Connect. You can remove individual staged entries or remove all stages. To synchronize any removed staged entries, see the Jobs section.
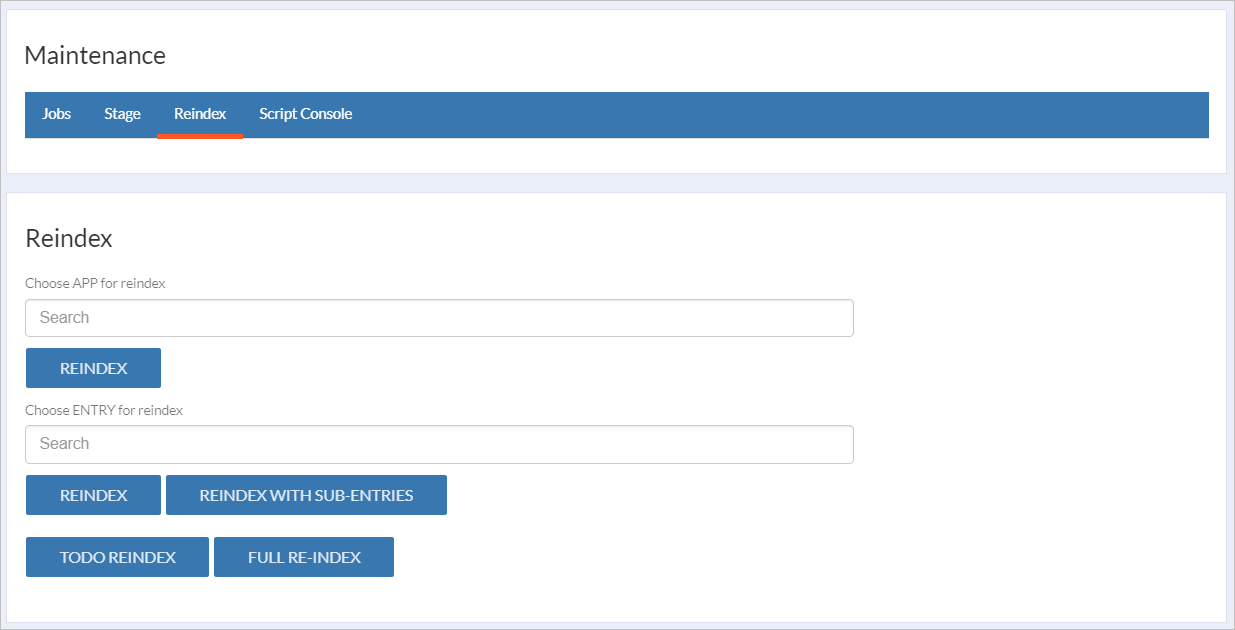
Under the Reindex tab you can find the Reindex section and the Tools section.
Reindexing repairs or updates the search index. You can reindex a specific app (Workflow, Home Page, Folder, and so on) asset, an asset and all assets under it, TODOs (tasks), or perform a full reindex of the system. The size of the item being reindexed impacts the run time.
Reindex: To reindex the current asset, select Reindex.
Reindex with sub-entries: To perform a reindex of the current asset and also all it’s children’s assets, select Reindex with sub-entries. For example, once you execute this reindex on Database Server, it will index DB server, all catalogs under it, all schemas under it, all tables under it and so on.
Full reindex: To perform a full reindex of the system, select Full reindex.
Todo reindex: To reindex only Todo tasks (referenced from comment), select Todo reindex.
Important
Reindex is available for those with Admin rights only.
You can perform the reindex in different locations.
Administration Console: Go to Administration > Admin Menu > Maintenance > Reindex. From the Admin Menu you can perform all reindex types.
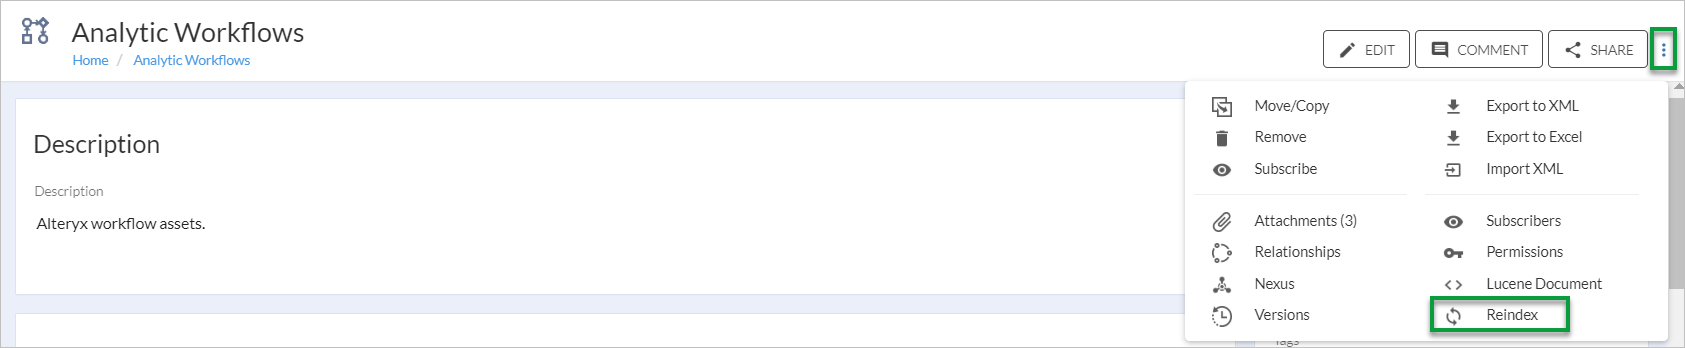
Three-dot menu for an asset: To perform a full reindex of a certain asset, select the three-dot menu of this asset, then select Reindex. To perform reindex of an asset with sub-entries, select Reindex with sub.

Three-dot menu for a specific app (Workflow, Home Page, Folder, and so on) asset: To perform reindex, select Reindex.
This re-generates the default user icons using a new color palette specification in the configuration file. Contact Alteryx Support for more information.
This clears the list of entries in the Your History section of the home page.
The Health Checks section allows you to check the database entries consistency. Go to Admin Menu > Maintenance > Health Checks, start a test, and then run repairs.

To execute the tests, select Run Checks. The following will be checked:
Whether all unique XIDs have equally or less than one active version.
Whether all required integration codes are present.
Whether all default folders (Analytic Workflows, Reports, Data Sources, Glossary, People, and Virtual Folders) are present.
To download the log, select the Download log button.
The information stored in the Health Checks log is also stored in the main Log (connect_catalina.log). However, you can download just the Health Checks log to review the errors and decide whether to fix them.
After you have performed the test, you can correct the issues that have occurred.
Details can be found in the log.
If there’s more than one active version of an asset, the most recent one will be specified as the active one.
In case you deleted any of the default folders, these folders will be recreated.
To fix the issues, select Fix Issues. You will be notified after the errors are fixed.
Notification Queue allows you to decide what to do with the items in your queue.
You can perform the following operations:
Flush: To process the queue immediately, select Flush. Use it in case the queue was stopped by the system.
Clear: To remove all notifications from the queue, select Clear. The notifications are not processed and are forgotten immediately.
Pause: To stop the queue, select Pause. The queue can still receive new notifications but can’t be processed until it’s resumed.
Resume: To start the queue again, select Resume.
The script console allows administrators to enter and run scripts. After selecting Run Script, the script's output is displayed in the field below.