These options are available on the workflow details page of Server UI for a workflow you own. That is, a workflow in your private studio. The options available on the workflow details page of workflows that other users have shared with you depend on your collection permissions and the settings of the workflow as determined by the workflow owner.
Rename the Workflow: You can rename the workflow by changing its name. Select Edit and change the name of the workflow. Then select Save.
Workflow Location: The workflow location shows the studio where the workflow was uploaded.
Latest Version: The latest version of the workflow. Select the version link to see the version history and info for each version.
Published: The published version of the workflow. Go to Publish a Workflow Version.
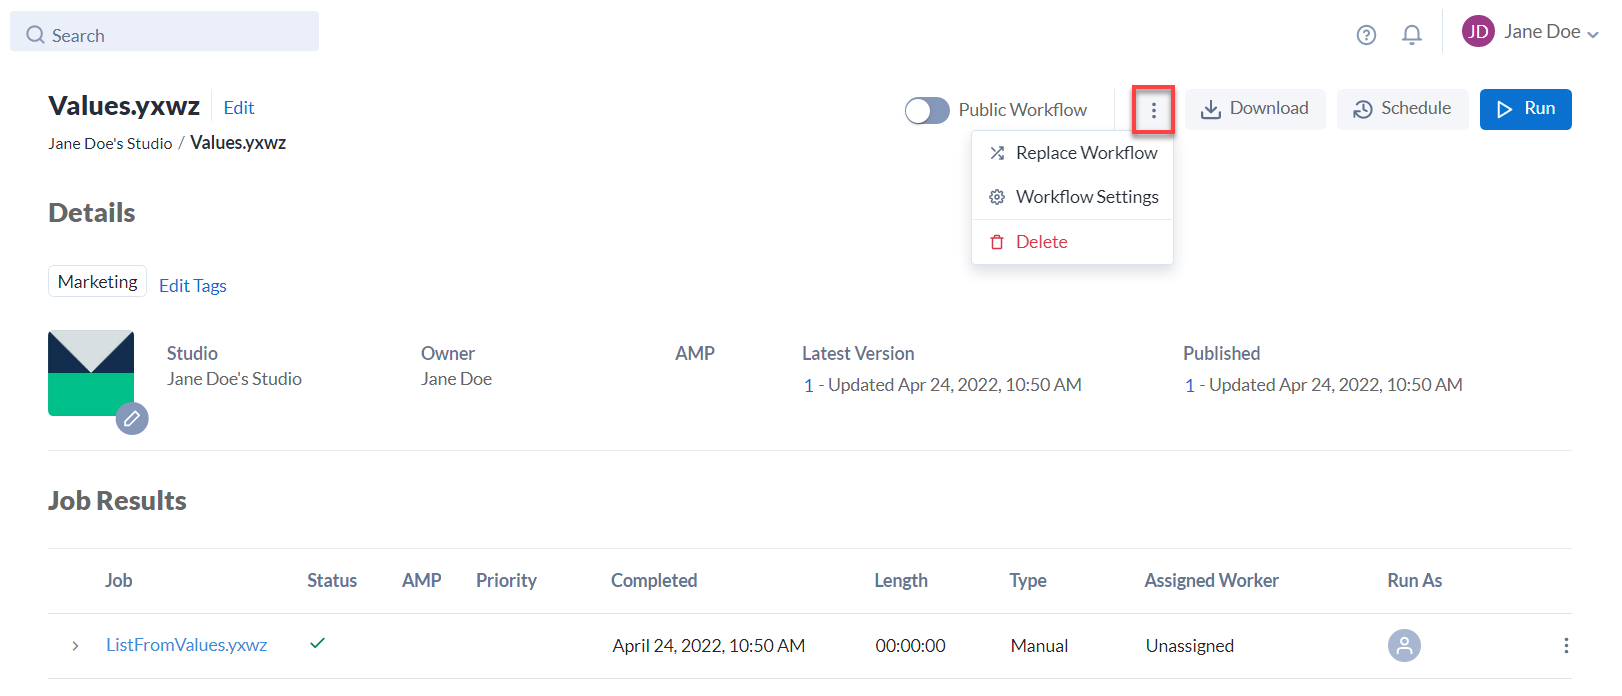
Public Workflow: To add your workflow to the Server UI Home page select Public Workflow and confirm the pop-up window.
Run: The number of times all users who have access have run the workflow.
Change Icon: To change the workflow icon, select the Pencil icon located on the workflow icon, and browse for a new icon.
Replace Workflow: In the three-dot menu, select Replace Workflow to replace the workflow with a new workflow. Go to Replace a Workflow.
Workflow Settings: In the three-dot menu, select Workflow Settings to edit these workflow settings:
Others can download this workflow: Adds the Download button to the workflow details page. Server admins have to also disable the Disable Direct Downloads option for the Download button to display. Go to Configuration.
This workflow can be run in the Gallery: Allows other users who have access to the workflow to run it.
Others can view this workflow's history: Allows users to view the version history.
This workflow is ready to be migrated:Check this to mark the workflow for migration. Go to Enable Workflows for Migration for steps to migrate your workflows. A Server admin has to enable the workflow migration at a Server level (go to Configuration).
Assigned Worker: To change the worker that runs the workflow, select a worker from the drop-down. If a worker is not assigned, the worker assigned to the studio runs the workflow.
Run Mode: This is the run mode for the workflow. Use run mode to block specific tools or access. The Server admin selects the Default Run Mode during Server configuration. Go to Gallery. To change the RunMode for the workflow, select a setting from the drop-down menu.
Unrestricted: Server users can run the workflow regardless of tools or access.
Semi-safe: Blocks Server users from running the workflow if it reads data from or writes data to a location that is not within the directory or sub-directory of the workflow staging directory (workspace).
Safe: Blocks Server users from running the workflow if it reads data from or writes data to a location that is not within the workflow staging directory (workspace). Server users are also blocked from running the workflow if it uses specific tools, events, and data connectors. Go to
Safe and Semi-safe Run Modes: Blocked Tools, Events, and Data Connectors.
Note
Semi-safe and Safe are only available if the Server admin has enabled the Run As setting in System Settings on the Worker > Run As screen or if a Run As user is specified. Go to Worker and Credentials for more information.
Edit Tags: Assign workflow tags to assist with workflow organization. To add a new tag, select Edit Tags, and select the tags you want to apply. To remove a tag, select the X icon on the tag you want to remove.
Run: Select Run to run the workflow.
Note
If a user's entitlement for Server is removed, their Server workflows will still run on Server, on the condition that these workflows exist in Server and are shared with other users. For more information on how to share a workflow, go to Add Workflows and Insights to a Collection.
Download: Select Download to download the workflow. This has to be enabled at the Server-level by a Server Admin, as well as, on the workflow level.
Schedule: Select Schedule to schedule the workflow to run. Go to Schedule a Workflow.
Job Results: The Job Results section is a list of your user's workflow runs.
Jobs Shared with Me: The Jobs Shared With Me is a list of all workflow runs completed by another user.