Create or Replace Macro
You can create reusable macros from sequences of steps in your recipe. These macros can be applied in other locations of the recipe or in other recipes. If needed, you can modify the steps in an instance of the macro to replace the existing steps, allowing you to make changes and updates to your macros.
Macros are user-defined sequences of recipe steps that can be referenced independently and parameterized as needed. A macro is composed of the following types of information:Macro Definition:
Steps are the recipe steps that are executed each time that the macro is invoked. A macro contains one or more steps.
Inputs are variables that can be modified wherever the macro is placed. For example, you might have an input that contains the name of a column. This column name may change between recipes, so you can create a macro input to capture the column name, which is the input value for the macro input. A macro input can be referenced one or more times in your macro steps.
For more information, see Overview of Macros.
Create Macro
Steps:
In the Recipe panel, select the step or steps to include in your macro.
Note
Source steps from your recipe do not have to be consecutive. In the macro, steps are listed in the order in which they appear in the recipe.
From the recipe toolbar context menu, select Create or replace macro.
Note
The dialog name and options vary based on the selection of create or replace macros.
From the drop-down, select Create a macro. Enter a Name and an optional Description.
Note
The Name of the macro appears in the Cloud Portal. Please verify that the Name is unique.
Click Next.
In the Create macro dialog, you can review the selected steps and the inputs for the macros:
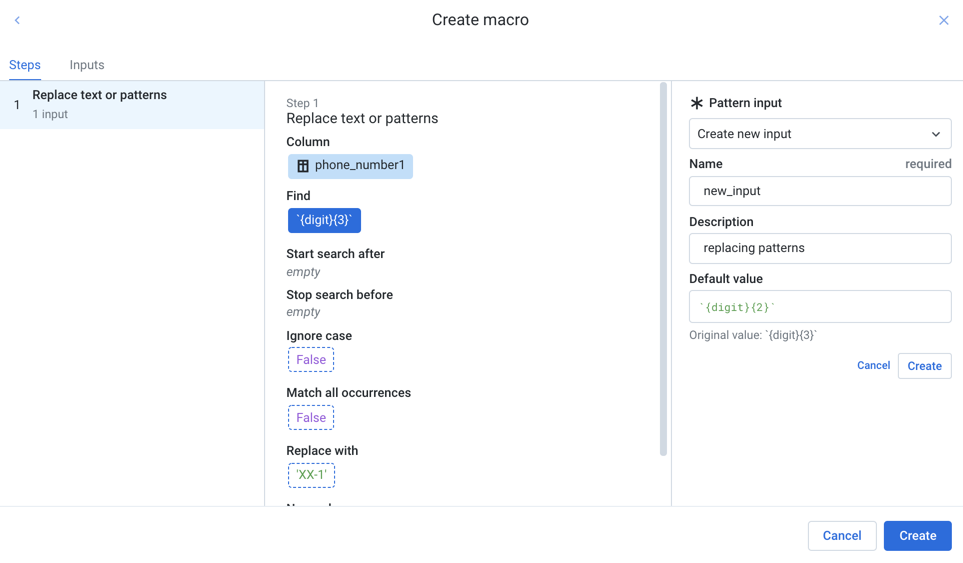
Figure: Create macro inputs
For each step in the macro:
Left column: Select the step.
Middle column: For the selected step, review the values that were specified for the step in the original recipe.
Right column: As needed, you can provide values for the currently selected inputs from the middle column. For a selected value, you can choose to create a new input or use an existing input.
You can review the macro inputs separately in the Inputs tab. For more information, see "Define macro inputs" below.
When you have finished specifying your macro and its inputs, click Create.
The macro is created.
In the recipe location where you created it from, the steps from which you created your macro are replaced with an Apply transformation step that references your macro name.
Define macro inputs
A macro input is a variable within the macro whose value can be set to a default or, if needed, modified in each instance of the macro.
When you are specifying a macro, the Cloud Portal reviews the steps of the macro to identify the values that can be modified in it. In the middle column of Steps tab:
Value type | Description | |
|---|---|---|
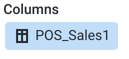
| Column names are automatically turned into inputs. | |
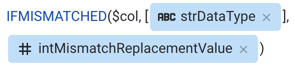
| These two values could be turned into macro inputs but are not currently defined as such.
| |
| These two values have been turned into macro inputs. |

Create macro inputs:
When you are defining a macro, you can create or modify macro inputs.
Tip
Macro inputs can be created or modified in the Steps or Inputs tabs.
Tip
Column names are always recognized as inputs. They can be modified as needed in each instance of the macro.
Steps:
To create a new macro input, select a value that is not highlighted.
In the right column, enter a name for this new macro input.
Specify its default value, and clickCreate.
The macro input is created. In the middle column, the highlighted value has been replaced by the name of the macro input.
To modify a macro input, click the entry in the middle column. Then, specify values as needed in the right column, and click Save.
To delete a macro input, select it in the middle column. In the right column, click Remove.
Note
You cannot delete column names as macro inputs.
Edit Macro
When you edit a macro, you can modify the name, description of the macro, as well as the names for any of its inputs.
Tip
To modify the steps of a macro, you must replace it. See "Replace Macro" below.
Steps:
You can use either of the following methods to edit the macro:
In the Macros page, click Edit from the context menu of the macro.
From the recipe toolbar context menu, select Edit macro.
In the Edit macro dialog, modify the name and description as needed.
Click Next.
In the Edit Macro dialog, click the Inputs tab.
Review the listed inputs:
To change the name of any input, select it.
In the right panel, enter a new name and description value for the input. Click Save.
Repeat the previous step for other macro inputs as needed.
To save your modifications to the macro definition, click Save.
Convert Macro to Steps
After you have created a macro, you may need to convert an instance of a macro to plain steps in your recipe for any of the following reasons:
The macro definition is going to be changed, and you do not want this instance of the original macro steps to be affected by that change.
The macro definition is going to be changed, and you want to use this instance as the basis for the new definition. See "Replace Macro" below.
To convert a macro to steps, select the macro instance in your recipe. Then, select Convert macro to steps in the context menu of the recipe toolbar.
Note
This operation converts the selected instance of the macro to a set of steps. It does not modify the definition of the macro. If preferred, you can delete the macro from the Macros page, which forces all instances of the macro in the workspace to be automatically converted to steps.
Replace Macro
To modify the steps in your macro, you must perform a replacement of all steps in the current definition.
Replace macro with another macro
You can replace a macro's steps with all of the steps of a macro that you have exported to your desktop.
Tip
This method is useful for publishing changes to a macro from one workspace to other workspaces.
Steps:
Export a macro definition to your desktop.
In the Macros page, find the macro whose steps you'd like to replace with a macro that you've exported to your desktop. From its context menu, select Replace.
You may need to remap macro inputs in the imported steps to the existing references. See "Update macro inputs" below.
Replace macro with steps
The following method can be used to replace a macro definition with steps that you have created in a recipe.
Tip
When replacing a macro, you can create new inputs for new steps and reassign inputs from the previous version to the steps that haven't changed.
Please complete the following steps.
Steps:
To replace all steps in the macro with new ones:
Create the steps in a recipe that you wish to use.
When you are ready to use them to replace a macro, select Create or replace macro from the context menu.
To modify the steps currently in the macro:
Open a recipe containing an instance of the macro.
Select the step that applies the macro. From the context menu, select Convert macro to steps.
All of the macro steps are now listed as individual steps in your recipe.
Add, remove, or modify steps to define your new macro.
Tip
You may want to remove the comment steps that mark the beginning and ending of the converted macro.
When you are ready to use them to replace the macro, select all of the steps. From the context menu, select Create or replace macro.
In the Create macro dialog, select Replace an existing macro from the drop-down.
From the Replace macro dialog, select the existing macro to replace.
If you want to save the copy of the existing macro, select the corresponding checkbox.
Note
Replacing an existing macro replaces all the macro steps with the steps of the new macro. All instances of the previous definition of the macro now reference the new macro definition. In some cases, you may need to reassign input values on old instances to align with the inputs in the updated macro definition.
Define macro inputs:
If the old version of the macro contained inputs, you should review those inputs and reassign them to values in the new macro definition.
Note
If you do not reassign the macro inputs from the old definition to the new one, then the values used for those inputs in macro instances created under the old definition are lost. After the replacement version is saved, you must review each instance of the macro to verify that it is working properly.
You can also create new macro inputs that apply to the added or modified steps.
See "Update macro inputs" below.
After you have reviewed the input, to replace the macro with the existing inputs, click Replace.
If you do not specify a relationship between the existing inputs and the replacement macro's inputs, a warning message is displayed.
Note
If you discard and save the changes, then any references to those inputs in the instances of the macro in the previous definition are broken.
Click Discard to save the macro.
Update macro inputs
When you are replacing a macro, the macro inputs from the old version are carried over into the new version that you are defining.
Note
To preserve the values that are stored in the macro inputs from the old version, you must reassign the old macro input to its corresponding input in the new version. If this reassignment is not completed, the input values specified in the old version are lost, and each existing instance of the macro must be reviewed and updated with new macro input values.
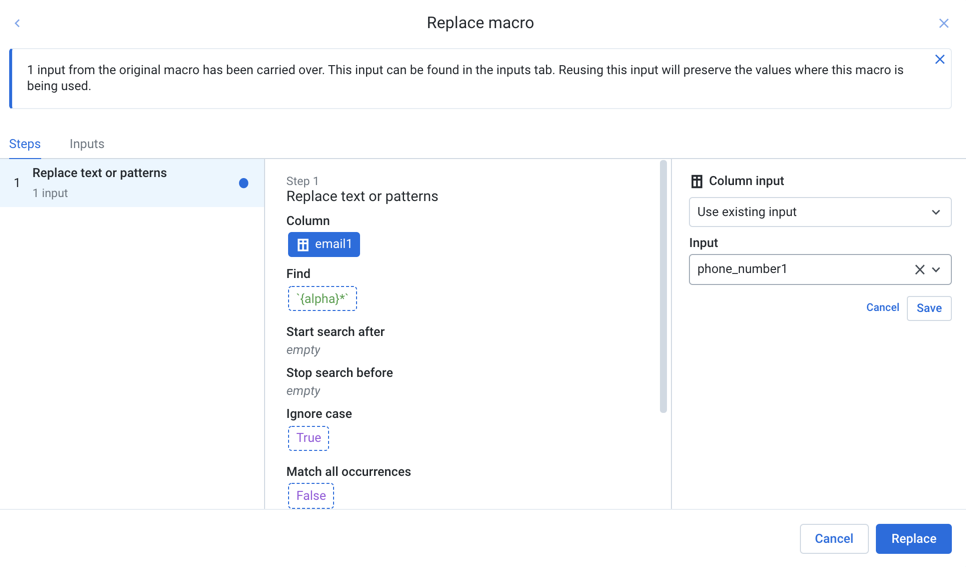
Figure: Reuse existing macro inputs
For each step in the new macro definition,
Review the inputs in the middle column.
If a listed input has a corresponding macro input in the old version, select the input. In the right column, select Use existing input from the drop down. Then, select the existing input to reassign to the new one. Click Save. The input values from the old macro input are preserved.
If needed, you can create new macro inputs from values in the middle column. See "Define macro inputs" above.
Repeat the above steps for each input.
Inspect Macro
When you inspect a macro definition, you review the steps that comprise the macro.
You can use either of the following methods to inspect the macro:
In the Macros page, click Inspect from the context menu of the macro.
From the recipe toolbar context menu, select Inspect macro.
The steps of the macro are displayed in raw Wrangle.
Tip
You can see the raw Wrangle for your macros in the Macros page in the Library for Data.
Apply Macro
You can use macros that you have created in other recipe locations. See Apply a Macro.
Manage Macros
You can manage macros through the Library for Data page.