Find Missing Data
When data is imported from another system, you might discover that some values are missing in it. In some cases, these values simply contain no content. In other cases, these values are non-existent. Depending on how the missing values entered the data, you may end up processing them in different ways. This section describes how to identify and manage missing data in your datasets.
Note
If you are unsure of the meaning of a column of data that contains missing values, you should attempt to review the source data or contact the individual who generated the data to identify why values may be missing and how to effectively manage them in Designer Cloud and downstream systems.
Locate missing values
When your dataset sample is evaluated, each column is validated against the column's type definition. Based on that validation, values in the column are categorized as valid, mismatched, or missing. These values are categorized in the data quality bar at the top of each column.
A missing value is any value that either contains no content or is non-existent.
An example of a non-existent value is a cell in a column of integers that has no value in it. In this special case, the missing value is called a null value.
Null values are converted to missing values during import.
Values that are spaces (one or more presses of the
SPACEBAR) or tabs (one or more presses of theTABkey) are not missing values.Tip
To trim whitespace out of a column, use the following transformation:
Transformation Name
Edit column with formulaParameter: Columns
column1
Parameter: Formula
TRIM(column1)
This step may increase the number of missing values (for values that contain only whitespace characters) and the number of instances of matching values (for values that have spaces before and after an alphanumeric value).
Return (
\n) and newline (\l) are considered missing.
In the data quality bar, missing values are identified in gray:
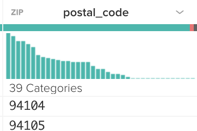
Figure: Missing values in gray
Tip
From the Transformer page, click the missing values in a column to see their count, highlight them in the rows of the data grid, and trigger a set of suggestions for your review.
Missing values can be sourced from a variety of issues:
Values may be miskeyed into the source system.
The source system may enable optional fields that do not contain values. For example, U.S. zip codes can contain a second, four-digit qualifier for the base 5-digit zip code (an extended Zip+4 code). This second value may not be required and may therefore be missing.
For columns of generated values, a computation may not be possible from the source data, which may indicate problems with other column data.
A set of missing values within a row may indicate a problem with the entire record.
The source system may introduce errors in output, particularly if the data is generated using a customized structure.
Tip
When cleaning up missing data, you should look to work from bigger problems to smaller problems. If a higher percentage of a column's values have been categorized as missing data, you should look across affected rows to see if it's a wider problem. If other records look ok, you should consider deleting the column or figuring out how to manage the missing values, including populating them.
Data may also be considered missing if you don't have sufficient information about the data. For example, timestamps that do not have a timezone identifier may not be usable in the target system.
Methods for fixing missing data
When you discover mismatched data in your dataset, you have the following basic methods of fixing it:
Identify if the column values are required.
Check the target system to determine if the field must have a value. If values are not required, don't worry about it. Consider deleting the column.
Remember that null values imported into Designer Cloud are exported as missing values, which are easier to consume in most systems.
Check the column header and data type to determine if values are required. For example, in transactional data, a field called
coupon_coderequires data only if every transaction is processed with one.If it's available, check the source system to see if it requires entry into the field. If an entry is required and your data contains missing values, then there is an issue in how the data was exported from the source system.
Insert a constant value. You can replace a missing value with a constant, which may make it easier to locate more important issues in the application.
Use a function. Particularly if the missing data can be computed, you can use one of the available functions to populate the missing values.
Copy values from another column. If a value from another column or a modified form of it can be used for the missing value, you can use the
settransform to overwrite the missing values.Delete rows. Select the missing values bar and use the
deletetransform to remove the problematic rows.Note
Since missing data may not be an explicit problem, you should avoid deleting rows or the column itself until other options have been reviewed.
Hide the column for now. You can remove the column from display if you want to focus on other things. Select Hide from the column drop-down. Note that hidden columns still appear in any generated output.
Delete the column. If the column data is unnecessary or otherwise unusable, you can delete the entire column from your dataset. Select Delete from the column drop-down.
Tip
Delete unnecessary columns as early as possible. Less data is easier to work with in the application and increases job execution performance.
Insert constants for missing values
Note
Generally speaking, inserting constants in place of missing values is not a recommended practice, especially if downstream consuming applications and individuals may not be known. In particular, you should not replace missing numeric values with a fixed numeric value, which will skew analysis. Use this method only if your entire data chain is aware of the constants.
Steps:
Click the gray missing values segment of the data quality bar for the column to fix.
Tip
Select a missing value in the data grid. Then, select the
replacesuggestion and then modify it to include the replacement value.In the suggestion cards, click the
setsuggestion.By default, this transform sets the missing value to be a null value. Click Edit.
You might seem something like the following:
Transformation Name
Edit column with formulaParameter: Columns
country
Parameter: Formula
IF(ISMISSING([country]),NULL(),country)
The missing data is identified using the
row:ISMISSINGreference. To apply a constant, replace theNULL()reference with a constant value, as in the following:Transformation Name
Edit column with formulaParameter: Columns
country
Parameter: Formula
IF(ISMISSING([country]),'USA',country)
Note that the single quotes around the value are required, since it identifies the value as a constant.
Click Add.
Tip
You can also use the IFMISSING function to test for empty values. Unlike the above construction, however, IFMISSING does not support an else clause when the value is present.
Copy values from another column
You can populate missing values with values from another column. In the following example, the nickname column is populated with the value of first_name if it is missing:
Transformation Name |
|
|---|---|
Parameter: Columns | nickname |
Parameter: Formula | IF(ISMISSING([nickname]),first_name,nickname) |
Use functions to populate missing values
Particularly for numeric data, you can use functions to populate missing values. In the following example, missing values for the unit_price column are derived from a computation of the weight_kg column and the price column:
Tip
Be careful using functions such as averages to compute missing values. These computations may factor outliers that have not yet been removed or may fail to account for local trends relative to the data. Study the values and their meaning in the column before performing replacements. When in doubt, a median value may be your best best, assuming outliers and spurious data have been properly addressed.
Transformation Name |
|
|---|---|
Parameter: Columns | unit_price |
Parameter: Formula | IF(ISMISSING([unit_price]),(price / weight_kg),unit_price) |
Manage Missing Metadata
In some cases, a column may contain valid values, but the meaning of those values is missing from the data. For example, your data contains the following Timestamp information:
Timestamp |
|---|
19 May 02:45:38 |
|
|
This timestamp information may be considered problematic for the following reasons:
The format may be incorrect for the target system.
There is no year information. If the target system contains multi-year datasets, it may cause issues. The month element should be interpretable by Designer Cloud.
There is no timezone information. In what timezone were these entries recorded?
The following examples demonstrate how to insert this information into your timestamps.
Example - Change Type
On import, timestamp data may be classified as String data. For now, this is ok.
Tip
Particularly for dates, data is often easiest to manage as String data type. Designer Cloud has a number of functions that you can deploy to manage strings. After the data has been properly formatted, you can change it to the proper data type. If you change data type immediately, you may have some challenges in reformatting and augmenting it. Do this step last.
After you have added back missing elements, you can change the data type to Date/Time through the data type drop-down for the column.
Before you begin reformatting your data, you should identify the target date format to which you want to match your timestamps. From the data type drop-down, select Date/Time. The dialog shows the following supported date formats:
Tip
When wrangling your data, you should start with the target structure or format of your data and work back to your source. This principle applies to both column management and overall dataset management.
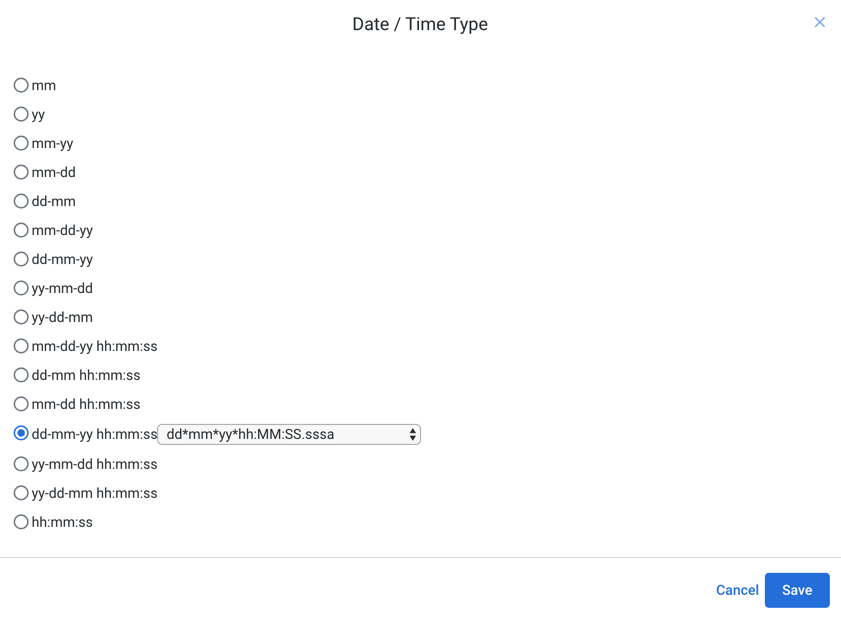 |
Figure: Available Date/Time formats
Note
Each available option has a set of sub-options in the displayed drop-down.
In this timestamp example, the target format is the following:
dd-mm-yy hh:mm:ss (dd*shortMonth*yyyy*HH:MM:SS)
Example - Insert Year
The easiest way to handle the insertion of year information is to split out the timestamp data into separate components and then to merge back the content together with the inserted year information. Since the above timestamp data essentially contains three separate fields (Day of Month, Month, and Time), you can use a split command to break this information into three separate columns. Highlight one of the spaces between Day of Month and Month and select the split suggestion. The Wrangle step should look similar to the following:
Transformation Name |
|
|---|---|
Parameter: Column | column1 |
Parameter: Option | By delimiter |
Parameter: Delimiter | ' ' |
Parameter: Number of columns to create | 2 |
Now, your data should be stored in three separate columns.
Tip
You may notice thatnew data types have been applied to the generated columns. The data may be easier to handle if all column types are converted to String type for now.
The next step involves merging all of these columns back into a single field, augmented with the appropriate year information. Select the columns in the order in which you would like to see them in the new timestamp field. In this case, you can select them in the order that they were originally listed. When all three columns are selected, choose the merge suggestion.
You may notice that the data has been formatted without spaces (19May02:45:38), and there is no year information yet. You can create new columns containing a year value (myYear) then merge the columns together:
Transformation Name |
|
|---|---|
Parameter: Columns | column2, myYear, column3, column4 |
Parameter: Separator | ' ' |
After you have inserted the year information and merged the columns, you should be able to change the column data type to the appropriate version of Date/Time.
Example - Insert Timezone
Timestamps do not natively support different timezones, so this information must be stored in a separate column. For U.S. data, timezones can be determined based on the zip code.
Note
If missing metadata is not supported as part of the value in the target system, you can insert the metadata as a separate column and then apply the metadata to the data inside the target system.