Upon completion of configuring the Controller for High-Availability and automated failover, it is highly recommended that you perform testing to validate the configuration and ensure the automated failover succeeds. There are several methods you can deploy to test the automated failover.
These steps can be performed from any server within the Failover Cluster.
Open Server Manager.
From the Tools menu, select Failover Cluster Manager.
Within the Failover Cluster Manager console, expand the newly created Cluster.
If the cluster is not displayed, from within the Actions pane, select Connect to Cluster… and follow the on-screen prompts to connect to the newly created cluster.
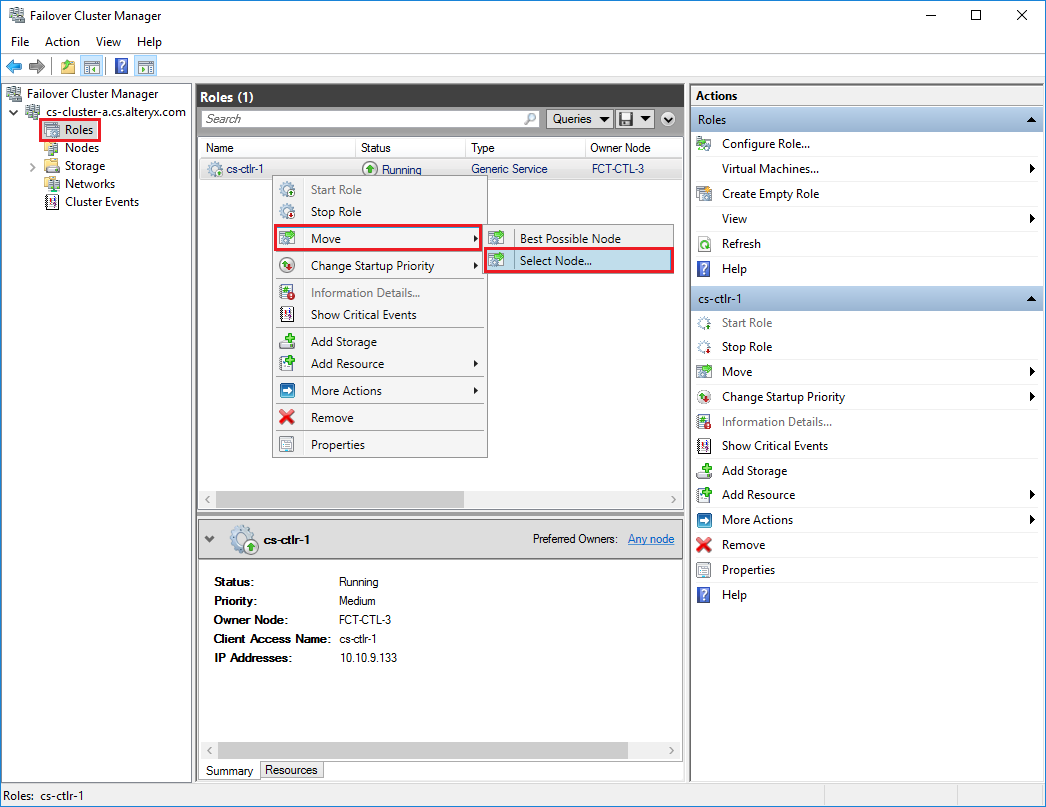
Within the Roles section of the newly created cluster, right-click the role and select Move > Select Node…

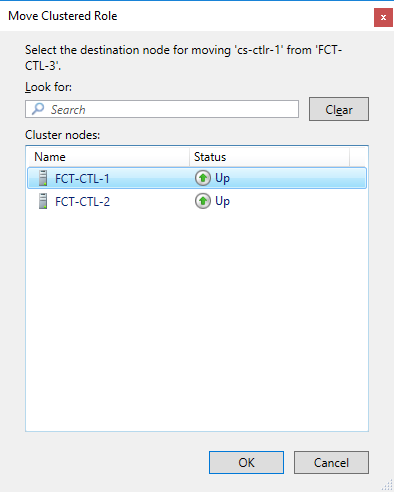
Select one of the available Cluster Nodes. The Move Clustered Role window will only display the available destination nodes, the current “Owner” node will not be displayed.

Select OK to initiate the failover to the selected Cluster Node.
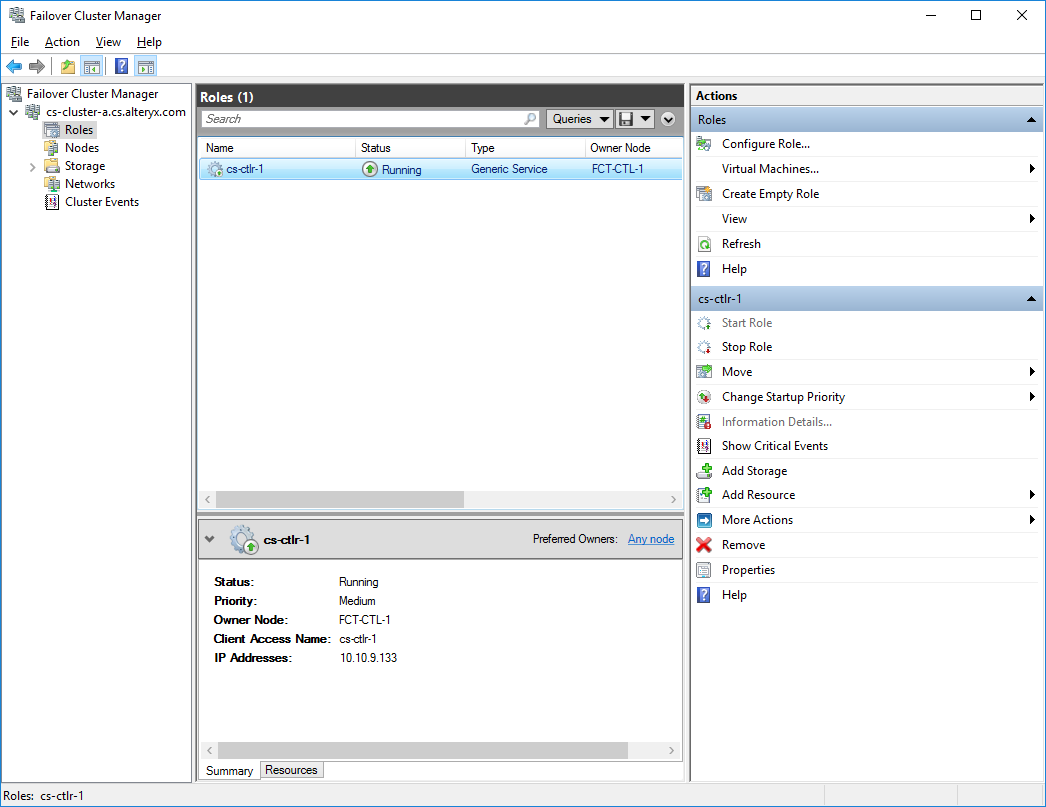
Once the “Owner” node has changed and the status is “Running”, proceed with verifying the failover of the Controller. For details on what to verify and testing, refer to the Failover Verification and Testing article.

Option 1 – System Shutdown
Login to Remote Desktop of the current “Owner” node.
Open the Windows Start menu.
Select Shut down to power off the server.
Option 2 - Power Off the Guest (Requires Access to the Virtual Machine Hypervisor)
Open the Virtual Machine Hypervisor.
Within the Hypervisor, locate and select the “Owner” node.
With the “Owner” node selected, power off the Virtual Machine.
Power off or unplug the server to force a failover.
Once the “Owner” node has changed and the status is “Running”, proceed with verifying the failover of the Controller. For details on what to verify and testing, refer to the Failover Verification and Testing section.