Mongo to SQL Migration Guide
This guide contains instructions on how to migrate your database from Mongo to SQL.
Before You Begin
When migrating from MongoDB to SQL persistence, you can complete the migration using the MongoDB to SQL Migration Tool on Server versions 2024.1, 2024.2, 2025.1, and 2025.2.
Always download the version of the MongoDB to SQL Migration Tool that corresponds to your specific Server version from the official download page. Before beginning your migration, we strongly recommend that you re-download the latest available version of the Migration Tool for your Server version to ensure you are using the most up-to-date release.
Please contact professional services for further assistance.
Prerequisites
Download the migration package from the Alteryx licensing portal. This package will also include a JSON file you need for Part 4 of the migration instructions.
Backup your MongoDB (for instructions, go to Alteryx Server Backup and Recovery Part 2: Procedures).
Important
If you migrate from MongoDB to user-managed MSSQL, you will NOT be able to downgrade to a release earlier than 2024.1 because SQL is not supported in those versions. To downgrade from a user-managed SQL environment, you need to first switch back to the last version of MongoDB you were using before you migrated to SQL.
If you made a backup of your MongoDB before the migration, you can switch it out with your current SQL database. You can do this by updating the connection strings in Alteryx System Settings for the Controller and Server UI to point to the old MongoDB again. Please refer to this knowledge article on Server Backup Recovery for more backup details. By doing this, you will be reverting back to the MongoDB at the point in time you did the migration. Any changes made to the environment after the migration to SQL will not be present in your old MongoDB.
You must have an MSSQL Server instance hosted and network accessible from your Alteryx Server controllers.
Currently, the only officially supported version of SQL is MSSQL Server 2019 and 2022.
We recommend using a separate SQL database for AlteryxGallery/AlteryxService to access.
The database access user must have admin privileges to create and use any databases Alteryx Server requires.
We recommend your SQL DB size to be twice the size of your existing MongoDB. For more information, go to Server SQL DB Customer FAQ.
The database default collation must be set to Latin1_General_100_CI_AS_SC_UTF8. This must be done before tables are created because table fields will retain the collation order from their creation, regardless of the database default collation being changed later. Incorrect field collation will cause errors in future upgrades.
The version of Server you are upgrading to 2024.1 from must be 2022.1+.
If you are on a Server version older than 2022.1, we recommend upgrading to 2022.1, 2022.3, 2023.1, or 2023.2, and then upgrading to 2024.1 from there.
If you use built-in authentication and you upgrade from a version lower than 2022.1, you need to reset your password due to security improvements. If you didn't reset your password in version 2022.1, you need to have SMTP enabled. This is so users can reset their password via the forgot password functionality or so that an admin can trigger password resets for all users via the UI or API. For more information on how to reset your Server password after an upgrade to 2022.1, visit the Reset a User's Server Password help page.
Install SQL Server drivers.
Download the Microsoft drivers.
For more information, see the Microsoft Support page.
Install Simba MongoDB ODBC Driver.
Go to Alteryx License Portal.
Select Download next to Drivers.
Select MongoDB.
Select Next > Download next to the latest Simba MongoDB ODBC Driver (64-bit) installer (for example,
Simba MongoDB 2.5.0.1000 64-bit.msi).Install after the download is complete.
Optional: Access to SQL Server Management Studio. This allows you to view/access database data manually, so you can verify and validate the state of your data without having to go into your Server.
Set Up Instructions
Before You Begin
Throughout these instructions you will see instances where you must input your AlteryxGallery database and AlteryxService database names. They will appear as “AlteryxGallery” and “AlteryxService”. You can choose to input your own database names instead of “AlteryxGallery” and “AlteryxService.” AlteryxGallery refers to the Server UI database and AlteryxService refers to the Controller database.
The Alteryx Server Migrator will automatically create the necessary databases and tables within your SQL Server instance required by Alteryx Server. To ensure a seamless setup and proper DB initialization, we strongly advise relying on this functionality as opposed to creating the databases and tables manually as the Alteryx Server Migrator configures the required collation and other settings. If you choose to pre-create the databases, please see this article explaining how to set the default collation and other required settings: How to stand up a new install of Alteryx Server with user-managed MSSQL persistence with custom database names.
Part 1: Install Latest 2024.1 Alteryx Server Build
Download the 2024.1+ Alteryx Server build from the Alteryx licensing portal.
Proceed with upgrading to 2024.1 as you normally would with no persistence changes.
Do not attempt to connect to a SQL database or run the MongoDB to MSSQL migrator workflow at this time. These steps will come later in the process.
Run the installer to complete install.
When prompted, enter the license key for the new build. If the license prompt doesn't immediately load, you can access it in Designer under Options > Manage Licenses > Activate New License.
Configure Alteryx System Settings as normal—NOT with SQL Server—and select Finish.
Start AlteryxService to complete the required MongoDB schema migration to the new version. Then confirm AlteryxService is running as expected.
Part 2: Manually Run the Alteryx Server Migrator
Create the requisite Databases and Tables in your SQL Server instance. To do this, open a windows PowerShell Command Prompt as an administrator and run the following. Note your SQL DB connection strings down for future use. Replace the [bold red text] with your own connection string values from your SQL instance details (brackets are not necessary for these parts of the string).
To find information on how to format these connection strings in SQL DB Advanced Connection Strings. The connection string for the Controller is different than the connection string for the Server UI.
If you’re using SQL Server authentication, run the following command:
. "C:\Program Files\Alteryx\bin\AlteryxServerMigrator.exe" --logfolder "C:\ProgramData\Alteryx\Service" --serversqldbconnectionstring "[Insert Server UI Connection String]" --servicesqldbconnectionstring "[Insert Controller Connection String]"
Part 3: Turn Off AlteryxService
In Task Manager, stop AlteryxService from running on all nodes in your environment including controller, Server UI node, and worker nodes.
Ensure MongoDB is running.
a. If you’re migrating from a user-managed MongoDB to SQL, skip step 2b and continue to Part 4.
b. If you’re migrating from an embedded MongoDB to SQL, follow these additional steps to manually start the embedded MongoDB instance without AlteryxService running:
Open Windows PowerShell as an administrator.
Run the following script replacing (C:\Program Files\Alteryx\bin\) with your install location and (C:\ProgramData\Alteryx\Service\Persistence\MongoDB) with your MongoDB persistence location.
. “C:\Program Files\Alteryx\bin\mongod.exe” -dbpath “C:/ProgramData/Alteryx/Service/Persistence/MongoDB” -port 27018 --auth --bind_ip_all
Migrate Your DB from Mongo to SQL
Part 4: Create an ODBC System DSN for MongoDB
Important
If you are using an embedded MongoDB, host your AlteryxService and AlteryxGallery databases in separate servers, or use different credentials. Then complete the following steps (1-13) for both databases.
To start searching for ODBC Data Sources (64-bit), select Windows icon or hit the Windows key.
Open the ODBC Data Source Administrator.
Select the System DSN tab and select Add…
In the Create New Data Source window, select the Simba MongoDB ODBC Driver, then select Finish.
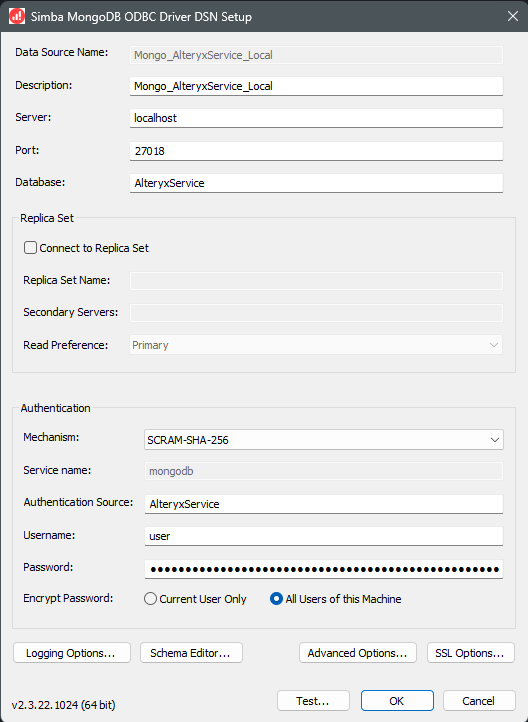
In the Simba MongoDB ODBC Driver DSN Setup window, fill in the following prompts:
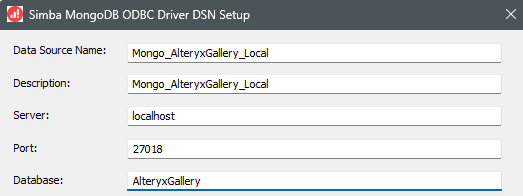
a. Data Source Name: {choose your own data source name}
For example, Mongo_AlteryxService or Mongo_AlteryxGallery. This name will be referenced later to identify this DSN connection in DCM.
This data source name will be referenced later to identify this DSN connection in DCM in Part 7, step 3a for the AlteryxService and Part 8, step 3a for the AlteryxGallery if applicable.
b. Description: {choose your own description}
For example, Mongo_AlteryxService or Mongo_AlteryxGallery.
c. Server: {your Server IP address}
Use localhost if you are on the machine where Alteryx Server is running.
To find the specific host IP address in your Alteryx System Settings, go to:
AlteryxService setup: Controller > Persistence > Database > Host
AlteryxGallery setup: Server UI > Persistence > Web Persistence > Host
d. Port: {Port for MongoDB}
AlteryxServer port is 27018 by default.
To find the specific port number in your Alteryx System Settings, go to:
AlteryxService setup: Controller > Persistence > Database > Host
AlteryxGallery setup: Server UI > Persistence > Web Persistence > Host
e. Database: [AlteryxService] or [AlteryxGallery]
f. Mechanism: SCRAM-SHA-256
g. Authentication Source : [AlteryxService] or [AlteryxGallery]
h. Username: user
i. Password: {your password}
To find the specific admin password in your Alteryx System Settings, go to:
AlteryxService setup: Controller > Persistence > Database > Password

AlteryxGallery setup: Server UI > Persistence > Web Persistence > Password

Simba MongoDB ODBC Driver DSN Settings for AlteryxService.
Top of settings for AlteryxGallery (second DSN), if needed. Authentication Source should be AlteryxGallery.
To test the connection to ensure it works, select Test… at the bottom of the Simba MongoDB ODBC Driver DSN Setup window. Then select OK on the test results window to close it.
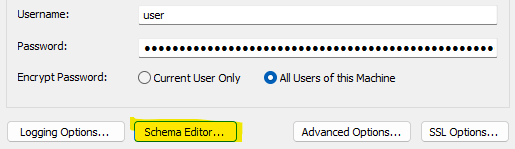
Select Schema Editor…
In the Schema Editor window, select Modify Local Schema Definition.
Select the file that accompanied the MongoDB to MSSQL_Migrator.yxzp workflow called MongoDB_Schema.json. You should be able to find this file in the resources folder where you extracted the MongoDB to MSSQL_Migrator.yxzp package to. Then Open the file. Then select Connect.
Important
If you have changed your Mongo database names to something other than AlteryxGallery and AlteryxService, you must edit the MongoDB_Schema.json file BEFORE you open the file in the schema editor.
To do this, open the MongoDB_Schema.json file in a text editor, search for AlteryxGallery and AlteryxService, replace the names, and save the MongoDB_Schema.json file changes.
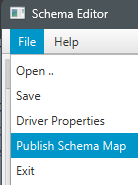
In the Schema Editor, select File > Publish Schema Map – this saves the schema to your database so that the ODBC Driver can reference the newly mapped tables.
After the schema map has successfully loaded, select OK.
Close the Schema Editor.
In the Simba MongoDB ODBC Driver DSN Setup window, select Advanced Options….
Change String Column Size value to 2147483647.
Change Binary Column Size value to 2147483647.
Then select OK.
Select OK in the Simba MongoDB ODBC Driver DSN Setup window.
Keep the ODBC Data Source Administrator open.
Repeat steps 3-15 if you used a separate MongoDB for your AlteryxService and AlteryxGallery databases or if you’re using an embedded MongoDB.
Once finished, select OK.
Part 5: Create an ODBC System DSN for MSSQL
Important
If you want to configure a separate database for AlteryxService and AlteryxGallery, complete the following steps (1-9) for both databases.
Go to ODBC Data Source Administrator (64-bit) window. Select the System DSN tab, then select Add…
Select the ODBC Driver 17 for SQL Server, then select Finish.
In Microsoft SQL Server DSN Configuration, fill in the following prompts:
a. Name: {choose your own data source name}
For example, MSSQL_AlteryxService_Local.
This name will be referenced later to identify this DSN connection in DCM in Part 9, step 3a.
b. Description: {choose your own description}
For example, MSSQL_AlteryxService_Local.
c. Server: {your Server IP address}
Use localhost if you are on the machine where SQL Server is running.
Select Next.
In the How should SQL Server verify the authenticity of the login ID? screen:
If you’re using SQL Server authentication, select With SQL Server authentication using a login ID and password entered by the user.
Login ID: {your user id}
Password: {your password}
If you’re using Kerberos or WinAuth, select With Integrated Windows authentication.
Select Next > Finish.
In ODBC Microsoft SQL Server Setup, select Test Data Source…
After confirming a successful connection in SQL Server ODBC Data Source Test, select OK.
In ODBC Microsoft SQL Server Setup, select OK.
Repeat steps 1-9 if you have a separate MSSQL server for AlteryxGallery.
Part 6: Open the YXZP File for the Migration Utility
Note
We recommend that you run your Designer migration workflow on the machine that has Controller installed. If you encounter an error and need to run the migrator again, delete the records in the newly created tables, and run the workflow again.
Locate the Migration Package for MongoDB to MSSQL_Migrator.yxzp workflow that you downloaded from the licensing portal.
Double-click the YXZP file and follow the prompts to open the workflow in Designer.
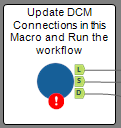
In the workflow, there will be a macro to update. Select the macro:
Important
When first clicking on the macro, you might see the macro has an error called “Selected connection is not available. Set one up to use the tool,” in the Results window before you run the workflow. You can disregard the error because it will resolve after you set up and run the workflow.
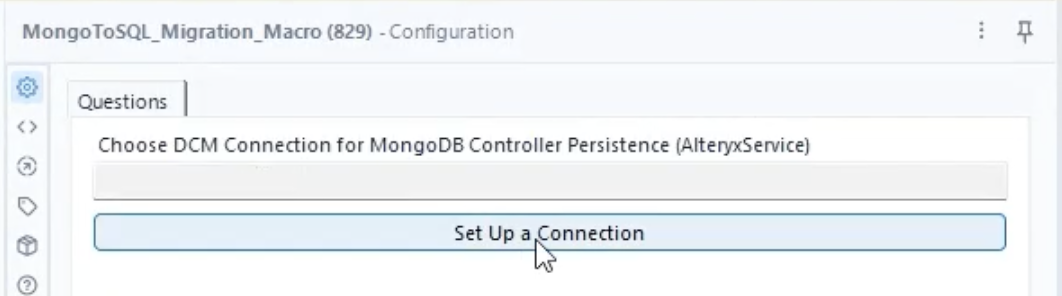
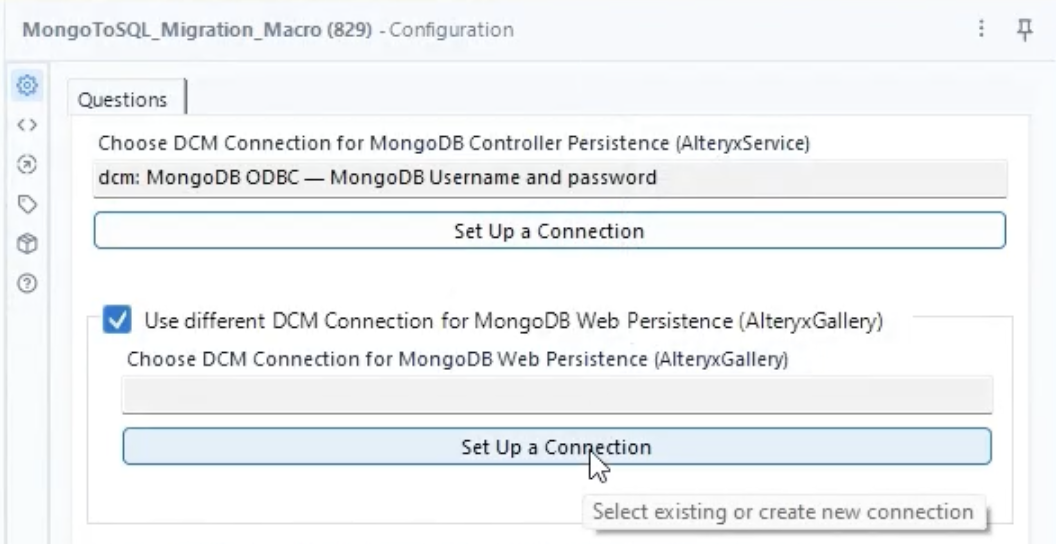
Part 7: Create a DCM Connection for Your AlteryxService MongoDB
Under Choose DCM Connection for MongoDB Controller Persistence (AlteryxService), select Set Up a Connection. If you are using an embedded MongoDB, host your AlteryxService and AlteryxGallery databases in separate servers, or use different credentials. Then this MongoDB connection will just be for AlteryxService, and in Part 8 you will create a connection for AlteryxGallery MongoDB. If you host AlteryxService and AlteryxGallery in the same database, this will be the only MongoDB connection you set up.
In the Connection Manager window, select + NEW.
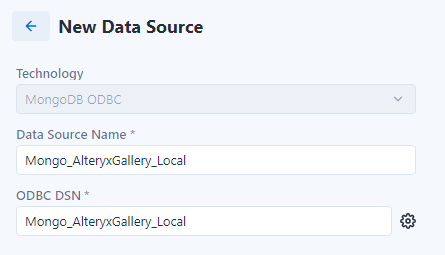
Under New Data Source, fill in the following:
a. Data Source Name: Enter the Mongo AlteryxService data source name you entered from Part 4, step 5a.
b. ODBC DSN: Select the MongoDB AlteryxService ODBC DSN you created in Part 4.
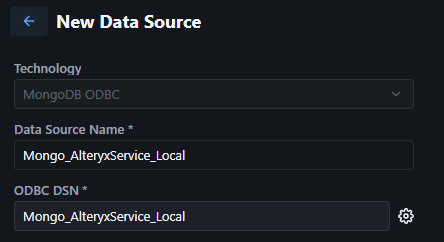
Select Save.
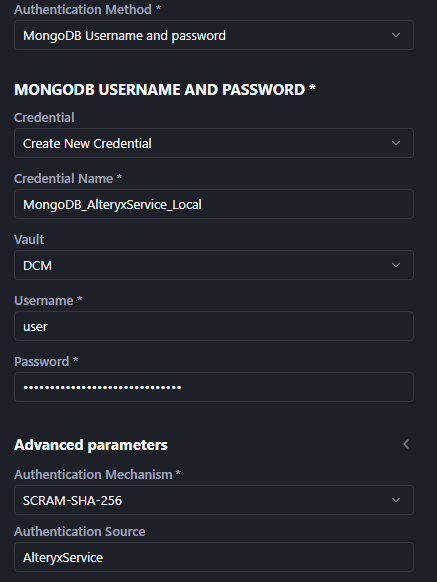
Select Connect Credential.
a. Authentication Method: MongoDB Username and Password
b. Credential: Create New Credential
c. Credential Name: Name of your choice
Example: MongoDB_AlteryxService_Local
d. Vault: DCM
e. Username: user
f Password: {your_password}
To find the specific admin password in your Alteryx System Settings, go to AlteryxService setup: Controller > Persistence > Database > Password.
g. Authentication Mechanism: SCRAM-SHA-256
h. Authentication Source: AlteryxService
i. Allow connection for SDK: Unchecked
Select Test Connection. If the connection test succeeds, select Create and Link.
If you host AlteryxService and AlteryxGallery in the same database, clear the box for Use different DCM Connection for MongoDB Web Persistence (AlteryxGallery) and continue to Part 9.
If you host AlteryxService and AlteryxGallery in separate databases, continue to Part 8.
Part 8: Create a DCM Connection for Your AlteryxGallery MongoDB
Select the Use different DCM Connection for MongoDB Web Persistence (AlteryxGallery) checkbox. Then select Set Up a Connection.
In the Connection Manager window, select + NEW.
Under New Data Source, fill in the following:
a. Data Source Name: Enter the Mongo AlteryxGallery data source name you entered from Part 4, step 5a.
b. ODBC DSN: Select the MongoDB AlteryxGallery ODBC DSN you created in Part 4.
Select Save.
Select Connect Credential.
a. Authentication Method: MongoDB Username and Password
b. Credential: Create New Credential
c. Credential Name: Name of your choice
Example: MongoDB_AlteryxGallery_Local
d. Vault: DCM
e. Username: user
f. Password: {your_password}
To find the specific admin password in your Alteryx System Settings, go to AlteryxGallery setup: Server UI > Persistence > Web Persistence > Password.
g. Authentication Mechanism: SCRAM-SHA-256
h. Authentication Source: AlteryxGallery
i. Allow connection for SDK: Unchecked

Select Test Connection. If the connection test succeeds, select Create and Link.
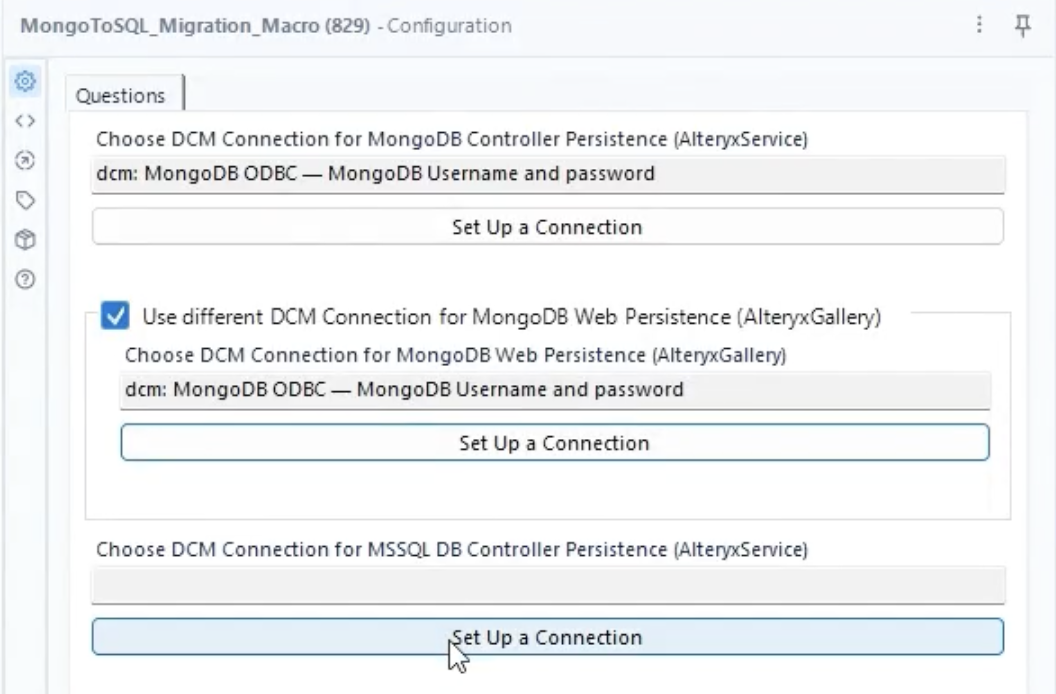
Part 9: Create a DCM Connection for Your MSSQL
Important
If you have a separate AlteryxGallery SQL DB you will complete this part twice - once for AlteryxService and once for AlteryxGallery.
Under Choose DCM Connection for MSSQL DB Controller Persistence (AlteryxService), select Set Up a Connection.
In the Connection Manager window, select + NEW.
Under New Data Source, fill in the following:
a. Data Source Name: Enter the MSSQL data source name you entered from Part 5, step 3a.
b. ODBC DSN: Select the MSSQL ODBC DSN you created in Part 5.
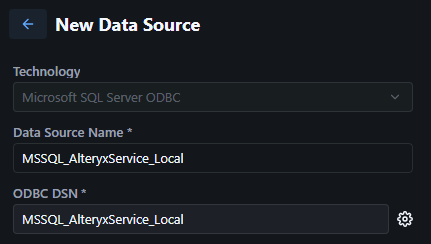
Select Save.
Select Connect Credential.
If you’re using SQL Server authentication:
a. Authentication Method: Username and password
b. Credential: Create New Credential
c. Credential Name: Name of your choice
Example: MSSQL_AlteryxService_Local
d. Vault: DCM
e. Username: {username}
f. Password: {your password}
If you’re using Kerberos and WinAuth:
Authentication method: No credentials
Select Test Connection. If the connection test succeeds, select Create and Link.
If you don’t have a separate AlteryxGallery SQL database, continue to Part 11.
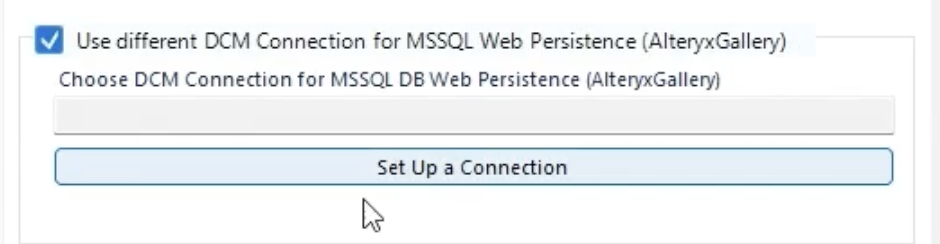
If you do have a separate AlteryxGallery SQL database, select the Use different DCM Connection for MSSQL Web Persistence (AlteryxGallery) checkbox.
Select Set Up a Connection, and repeat steps 2-5 using AlteryxGallery information instead of AlteryxService.
Part 10 (Optional): Update Database Names if Using Non-standard Naming
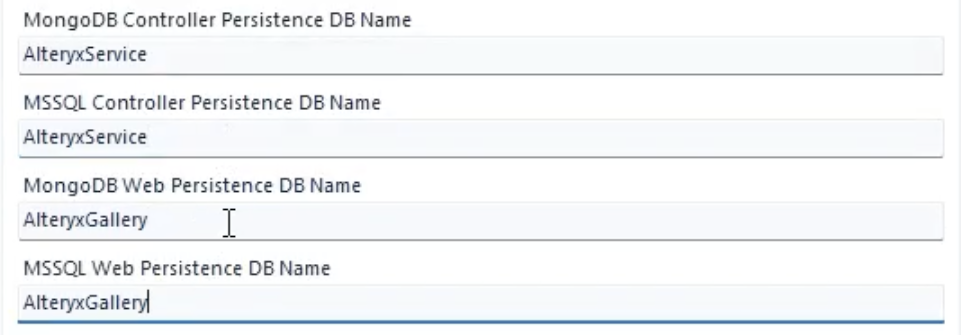
If your MongoDB or MSSQL AlteryxGallery and AlteryxService databases are not named exactly “AlteryxService” and “AlteryxGallery”, continue with this part. If not, continue to Part 11.
Fill in the following database names with your actual database names:
MongoDB Controller Persistence DB Name
MSSQL Controller Persistence DB Name
MongoDB Web Persistence DB Name
MSSQL Web Persistence DB Name
Part 11: Run the MongoDB to MSSQL_Migrator Workflow
In Designer, select Run to run the MongoDB to MSSQL_Migrator.yxmd.
As this workflow is running, you will see 1 warning. If you select it, the results window will show you how far along the total migration process is.
Once the workflow is completed running, you will see the record counts that have been migrated. These files are also saved into the local folder and you can retrieve them.
After the run is complete, check the results window to see if any errors occurred during the run. If errors are present in the results window, copy the errors and send them to your support representative.
For more information on migration troubleshooting, re-running the migrator, or returning to your original MongoDB, see the Server SQL FAQ Page.
If the migration has completed successfully, you will see 0 errors in the results window and the logs will show all records have been transferred from MongoDB to MSSQL and you can continue to Part 12.
Part 12: Configure Alteryx System Settings
After you have successfully migrated your data from the MongoDB to the SQL DB, you will change the persistence information in Alteryx System Settings from your old MongoDB to your new SQL DB.
Important
The connection string for the Controller is different than the connection string for the Server UI.
Open System Settings and configure as usual except for the following changes:
Environment > Setup Type:
Select Complete Alteryx Server for single instance installation.
Select Custom for multi-node installation.
Controller > Persistence:
Database Type: Select User-Managed SQL DB.
Database > SQL Connection. Enter your own Controller connection string value from your SQL instance details.
For more information on how to format this connection strings, go to SQL DB Advanced Connection Strings. Note that the Server UI connection string and Controller connection string have different formats.
Server UI > Persistence:
Database Type: Select User-managed SQL DB.
Web Persistence > SQL Connection: Enter your own Server UI connection string value from your SQL instance details.
For more information on how to format this connection strings, go to SQL DB Advanced Connection Strings. Note that the Server UI connection string and Controller connection string have different formats.
To complete your Alteryx System Settings configuration, select Next/Done.
Now the SQL DB is ready to use in Server as the migration is complete. Open Server.
You can shut down the MongoDB server at this time. Leaving it running will not impact the Alteryx Service, aside from the usage of any local resources needed to keep it running.
Note
If you’re using Kerberos and WinAuth: AlteryxService fails to start when it is set to run under Local System Account. To resolve this, run the AlteryxService under the domain account.