Configure Alteryx Server for SCIM with Microsoft Entra ID
This document provides instructions for administrators who want to integrate Alteryx Server with Microsoft Entra ID using System for Cross-domain Identity Management (SCIM). Use this guide to learn how to enable SCIM in Server, configure Microsoft Entra ID to connect to Server for SCIM provisioning, and provision users and groups in Microsoft Entra ID. With this integration, you can streamline user and group management, ensuring a synchronized and hassle-free experience between Alteryx Server and Microsoft Entra ID.
Note
This configuration requires Microsoft Entra ID to be able to communicate with the Alteryx Server over an HTTPS (SSL/TLS) connection. Please check with your network and security teams to ensure network, firewall, and routing are appropriately configured to allow this communication. To support this communication, TLS must be enabled for Alteryx Server. For more information on TLS, use Configure Server SSL/TLS.
Enable SCIM Support
SCIM requires that Alteryx Server is configured to support SAML single sign-on.
For a new environment, follow the steps outlined in Configure Alteryx Server Authentication to set up SAML.
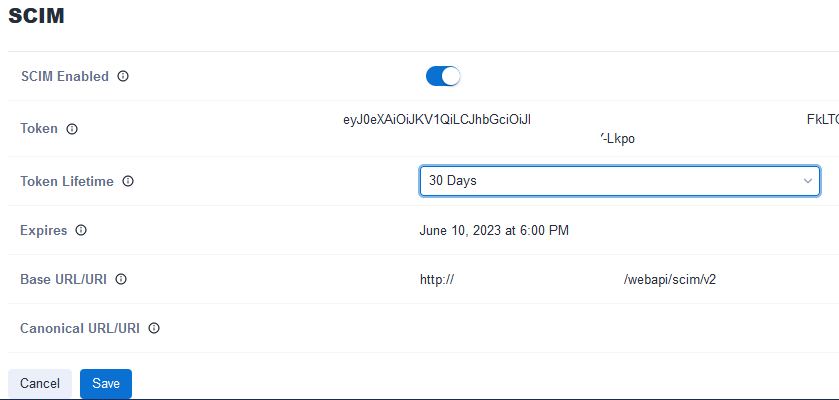
Sign in to Alteryx Server as a Curator (Server admin) and navigate to Admin > Settings > Configuration > SCIM.
Select Edit.
Turn on the switch to enable SCIM.
Select the Token Lifetime based on your needs. Please consult your company's security team for guidance.
Select Save.
Make note of the Base URI and Token as you will need these to configure the connection in Microsoft Entra ID.
Configure Microsoft Entra ID
Sign in to Microsoft Entra ID.
If you do not already have an Application created for Alteryx Server, select Enterprise applications.
Select +New application.
Select +Create your own application.
In the right-hand panel, enter a name for the application, such as “Alteryx Server”.
Select Integrate any other application you don’t find in the gallery (Non-gallery).
Select Create.
Once the app is created, select Single sign-on and configure the app for SAML. Use Configure SAML 2.0 on Alteryx Server for Microsoft Entra ID for details.
Once you have an application created for Alteryx Server, navigate to that application.
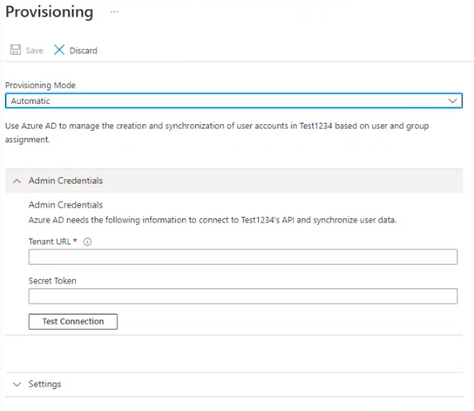
Select Provisioning.
Select Automatic for the Provisioning Mode.
For Tenant URL, enter the Base URI you noted in the Enable SCIM Support section (for example,
https://host.domain.tld/webapi/scim/v2).For Secret Token, enter the Token you noted in the Enable SCIM Support section.
Select Test Connection to confirm Microsoft Entra ID can connect to Alteryx Server.
If the connection test fails:
Note
While SAML sign in might work by default as this involves internal to public communication from a user, this does not mean that your Microsoft Entra ID instance has direct line-of-site to your Alteryx Server instance (which requires successful communication from Microsoft Entra ID’s public cloud to a private network) required for SCIM to function properly.
If you get the error "An error occurred while sending the request.", please review the below options to ensure proper communication between these systems.
Ensure you have entered the correct URL and Token.
Consult your network and security teams to ensure network connectivity between Alteryx Server and Microsoft Entra ID is allowed.
If you cannot allow Microsoft Entra ID to connect directly to Alteryx Server, you might be able to use the Microsoft Entra ID's provisioning agent instead of this configuration. Please consult with your Microsoft Entra ID administrator and Microsoft Entra on-premises application provisioning to SCIM-enabled apps for details.
Provisioning Users and Groups
Log in to Microsoft Entra ID.
Navigate to the application you created for Alteryx Server in the Configure Microsoft Entra ID section.
Select Users and Groups.
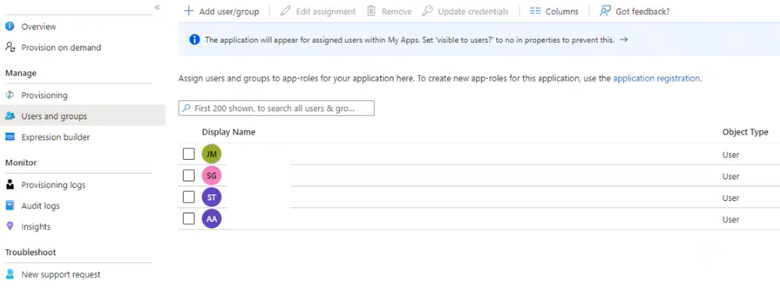
Select +Add user/group.
In the right-hand panel, use search to find and select the users and groups you want to add.
The selected users and groups appear in the lower section of the panel.
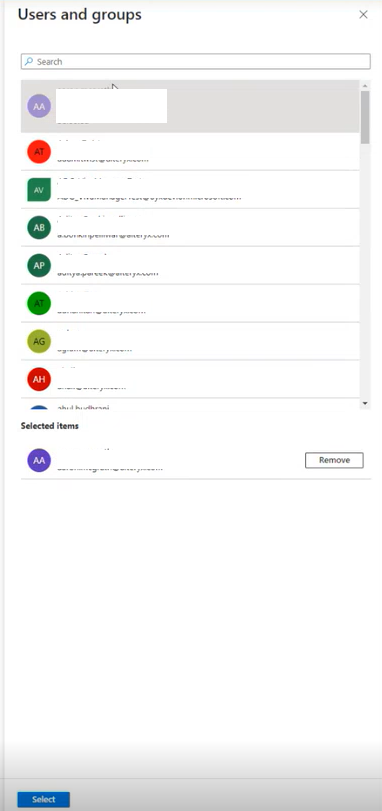
To finalize your selection, choose the Select button at the bottom of the panel.
This returns you to the Users and Groups page with a list of the users and groups associated with the application.
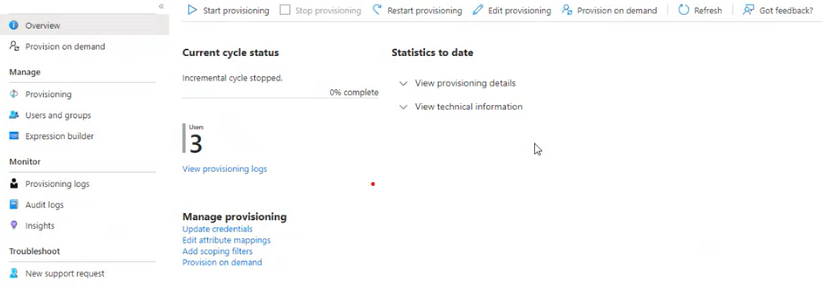
Select Provisioning.
Select Start provisioning to enable provisioning. This starts the incremental provisioning cycle with which Microsoft Entra ID synchronizes users and groups with Alteryx Server. Any changes to users or groups in Microsoft Entra ID are reflected in Server when this sync completes. Microsoft Entra ID can take up to 40 minutes to synchronize changes.
The provisioning process in Alteryx Server produces the following outcomes based on the users and groups assigned to your SCIM app:
Users: Created with the Default role.
Alteryx Custom Groups: Created for each Active Directory group, with the Default role assigned.
User Assignments: Users are added to their respective Custom Group(s) based on their Active Directory group membership.
Confirm Successful Synchronization
Wait at least 40 minutes to ensure Microsoft Entra ID goes through a provisioning cycle.
Sign in to Alteryx Server as a Curator (Server admin).
Navigate to Admin > Users.
Confirm that the users and groups provisioned in Microsoft Entra ID have been successfully created or updated in Server.
Note
If Users or User Groups do not initially appear in the Server UI, restart the provisioning cycle in Azure and then reload the Server UI in the browser.